Table of Contents
Motivation
In this day and age, every university pairs a student’s email address with their administered Google suite platform. Typically, for most students, this default saves them a lot of trouble—that is, if you stay within the constraints of what your university considers “normal use”. For instance, if you want to use Google domains, Google cloud’s APIs, or customize your Google security options, you are going to have a bad time. Don’t get me wrong, I understand why some of these rules are forced upon students, but precisely because they are forced, I believe that there should be leeway for students that wish to opt out of the default settings. Now, this blog post won’t teach how to petition your university to rid of Google, but it will teach you how to set up a terminal alternative to Gmail (most notably this blog is for college students that are forced to use Google’s email platform).
This blog assumes basic terminal maturity.
Moreover, this blog has now been updated to cover isync and more. See the update section near the end!
Neomutt
End Goal
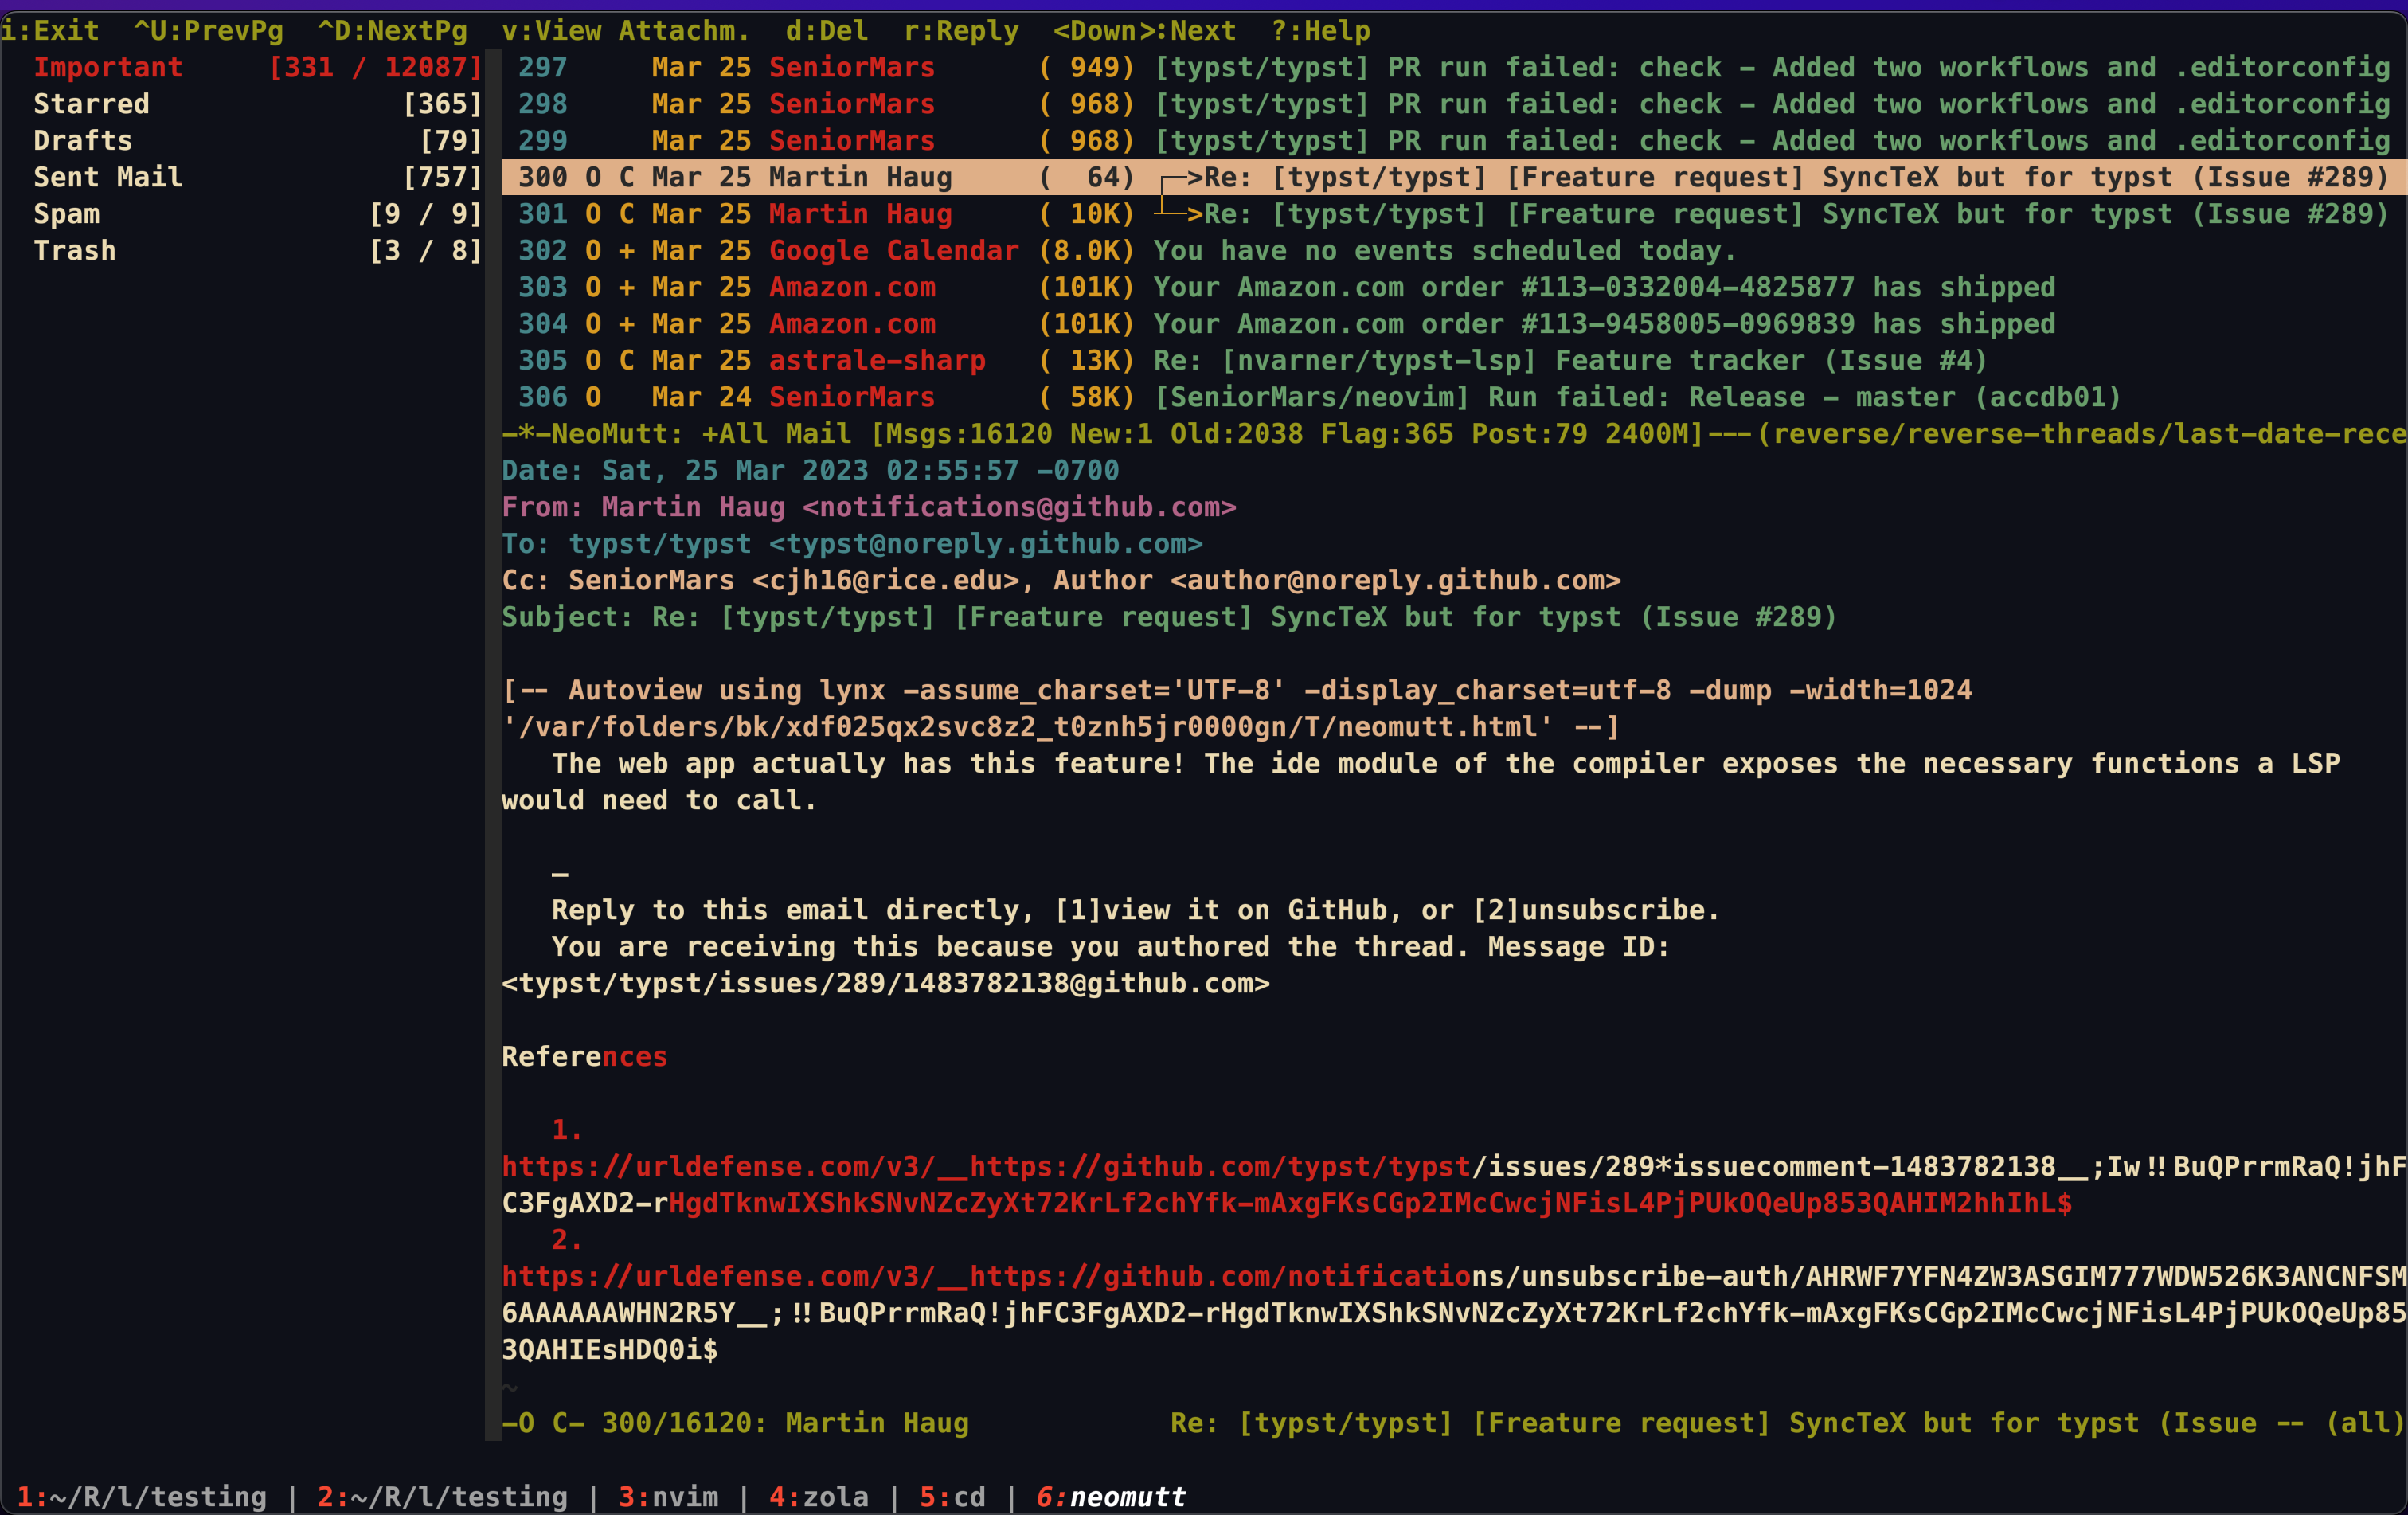
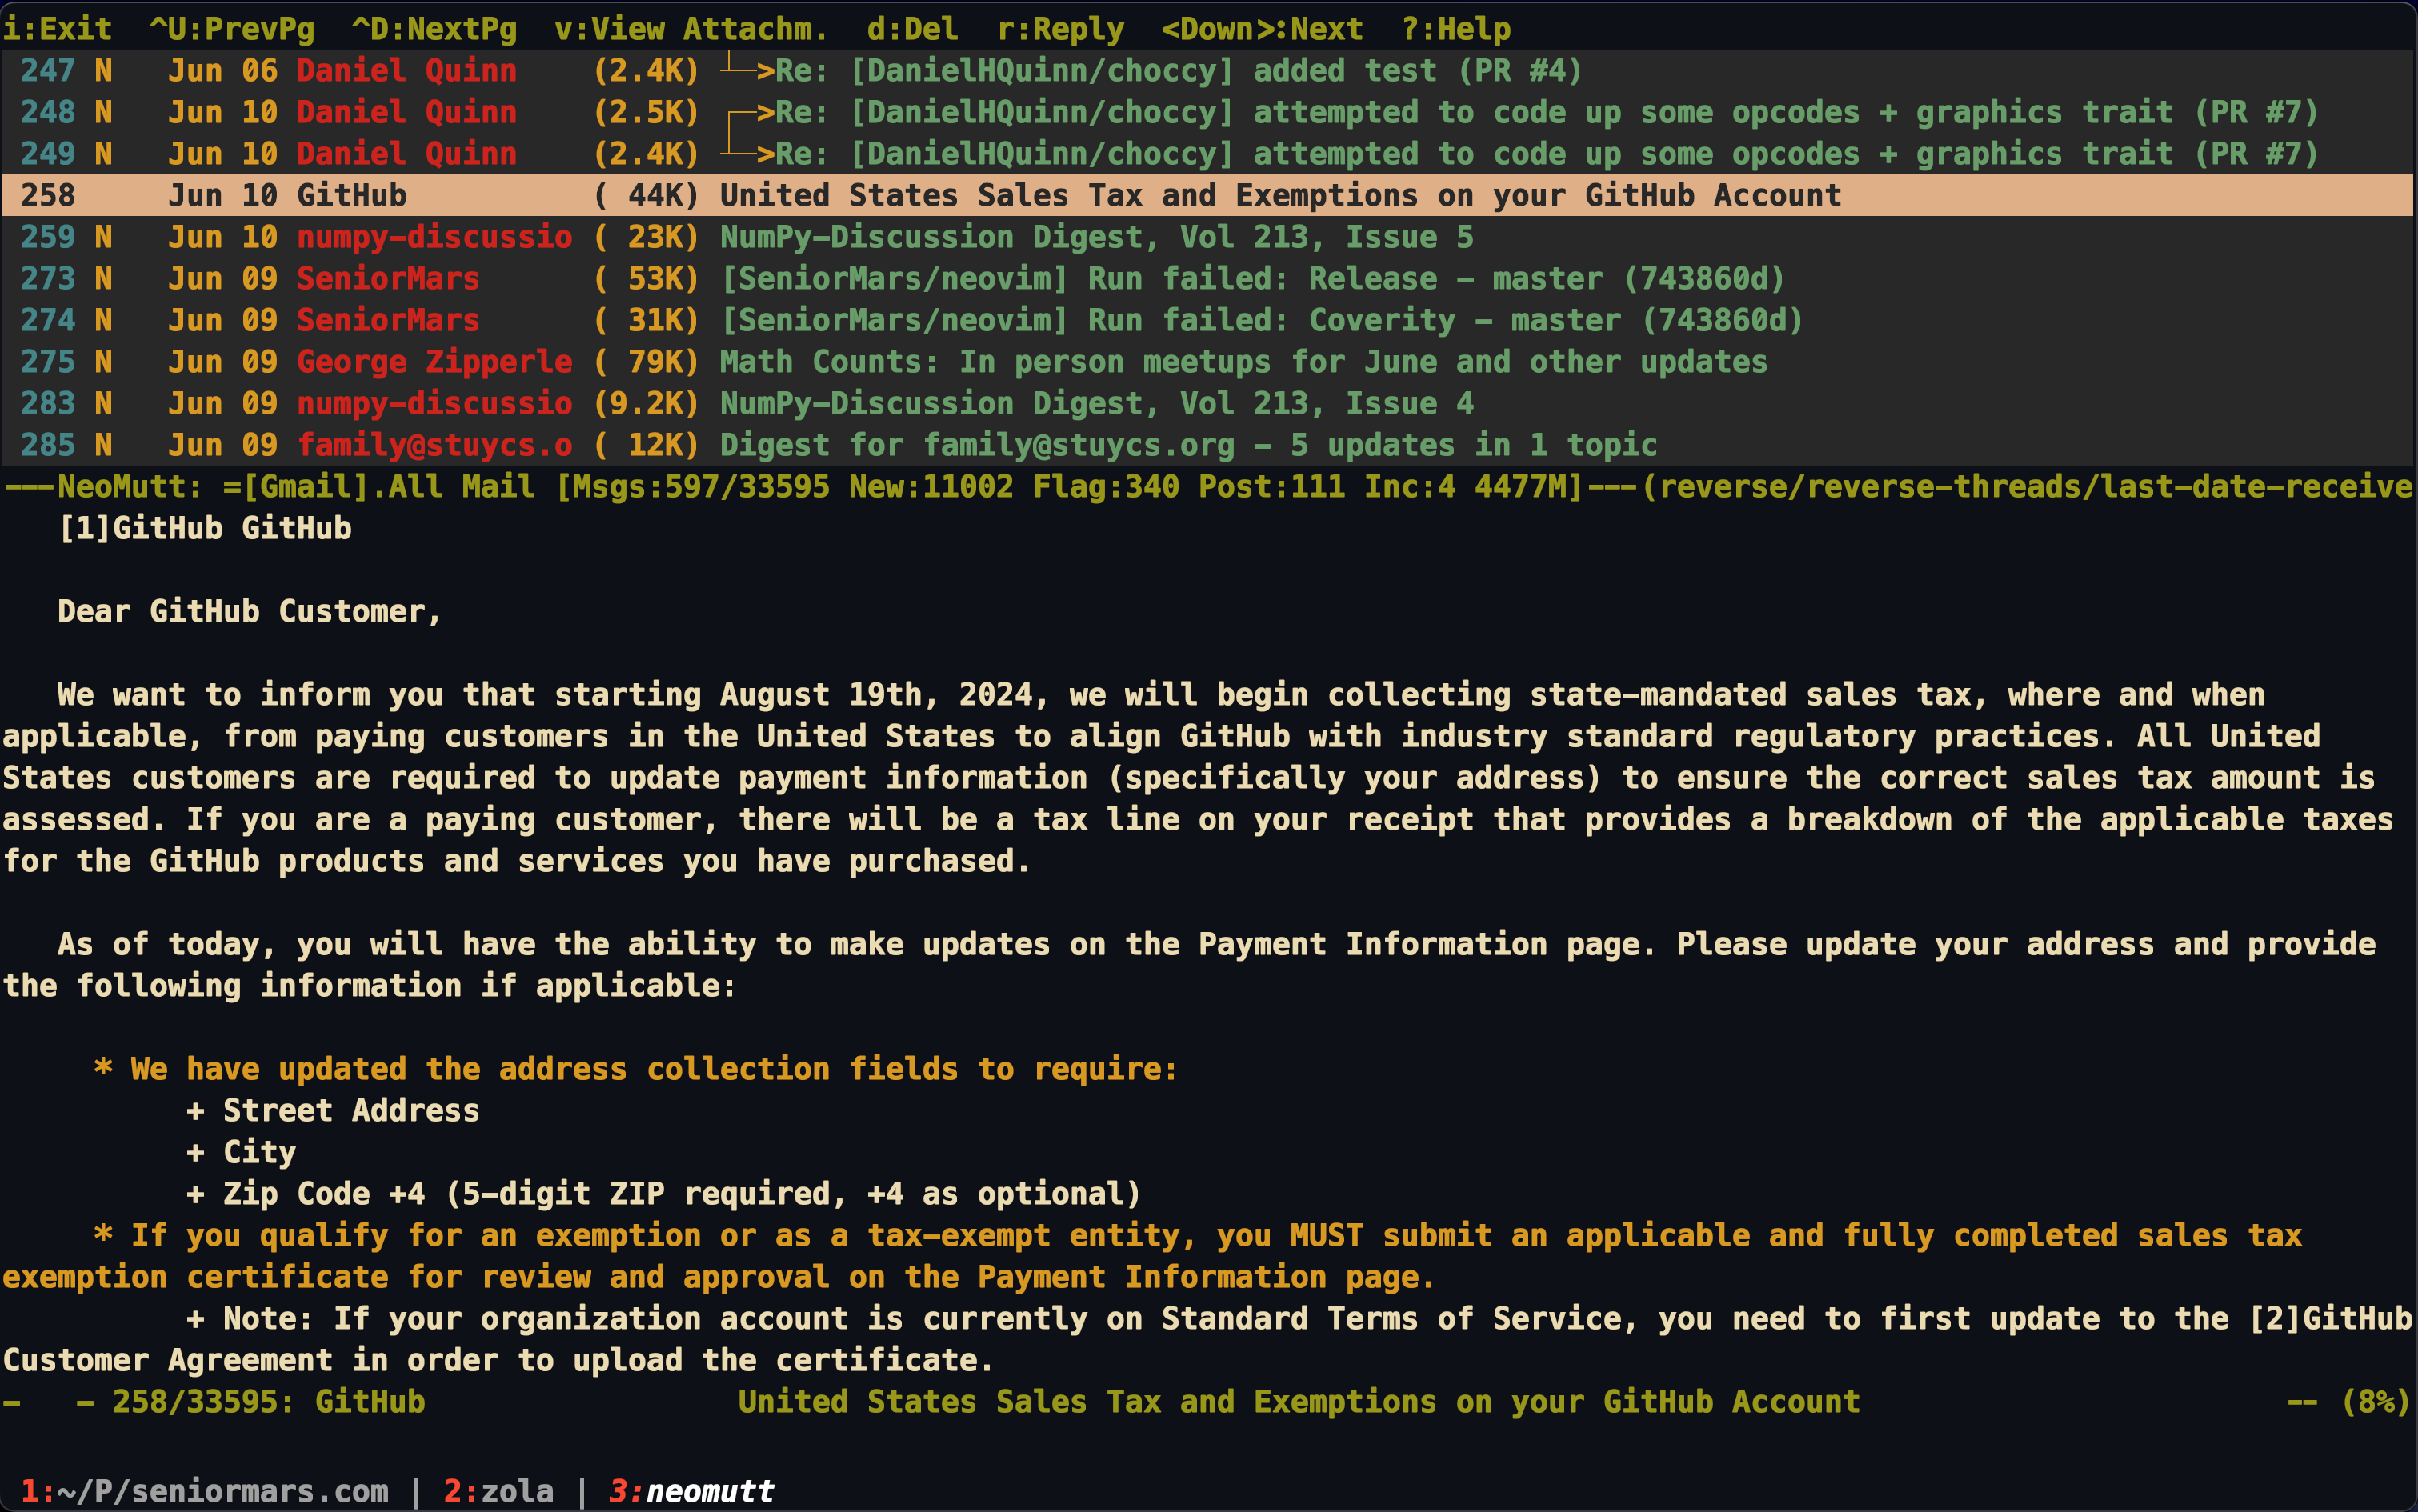
Before I continue, I would like to show you what the result will look like:
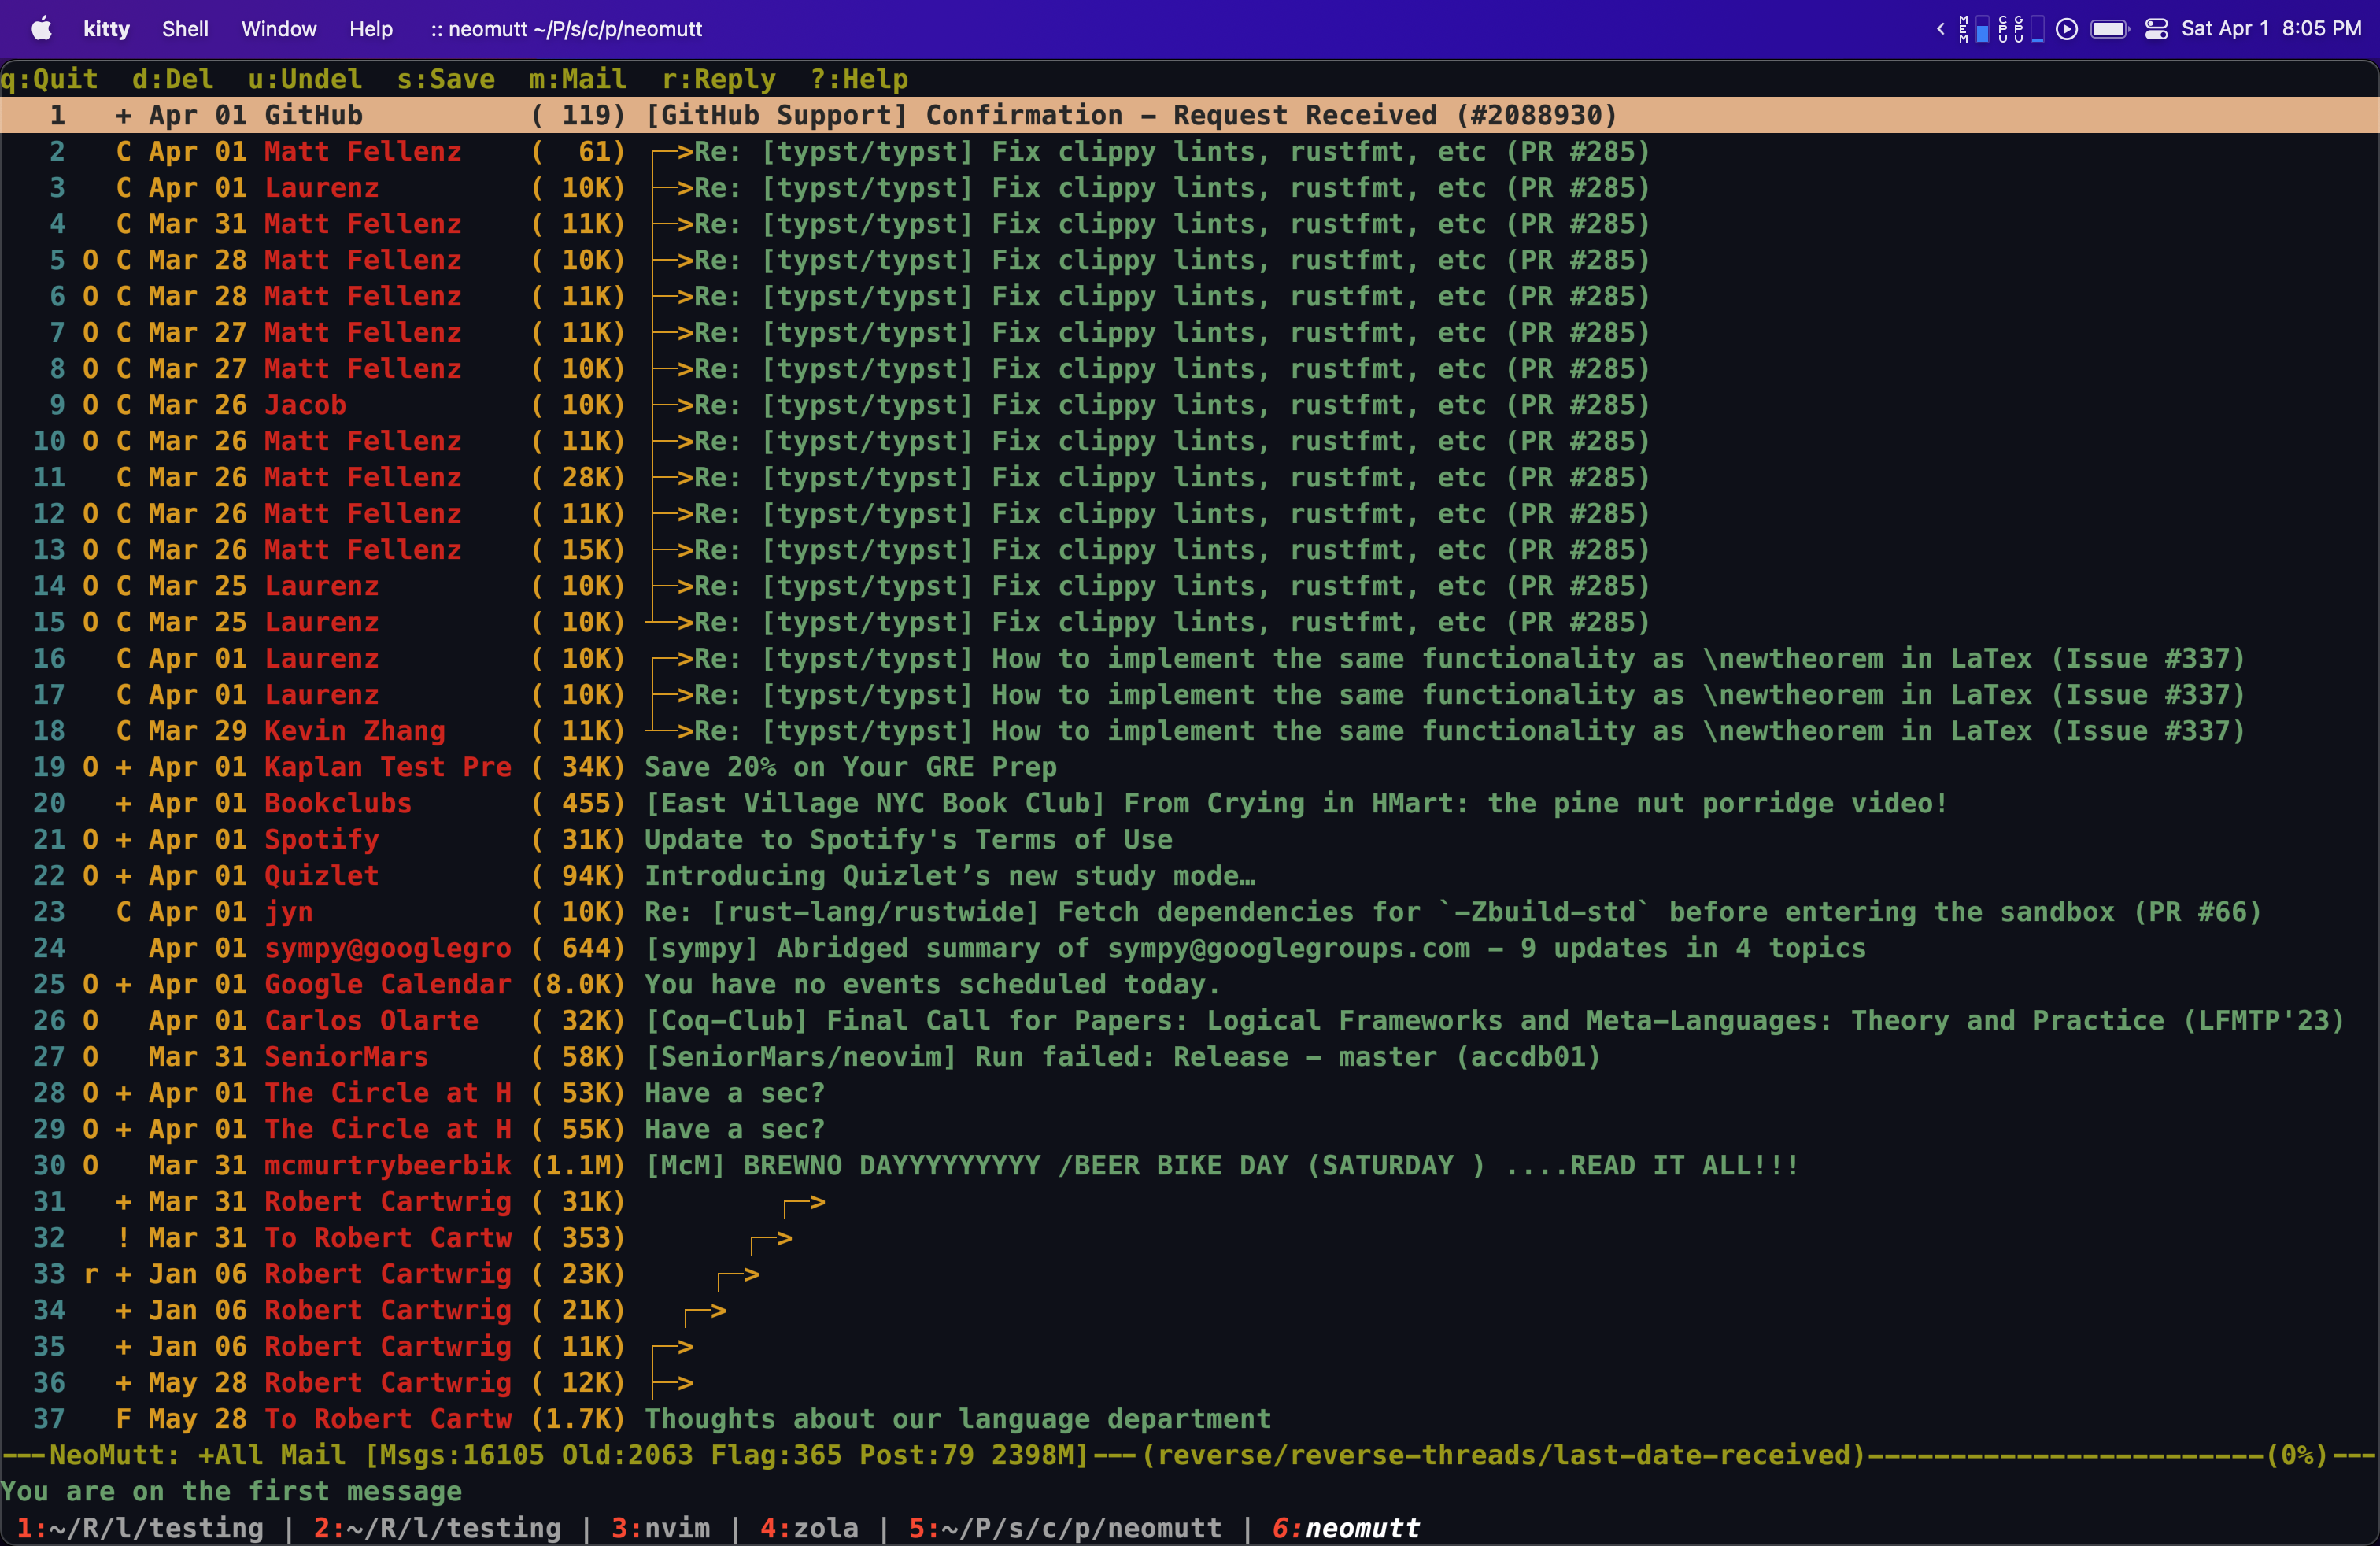
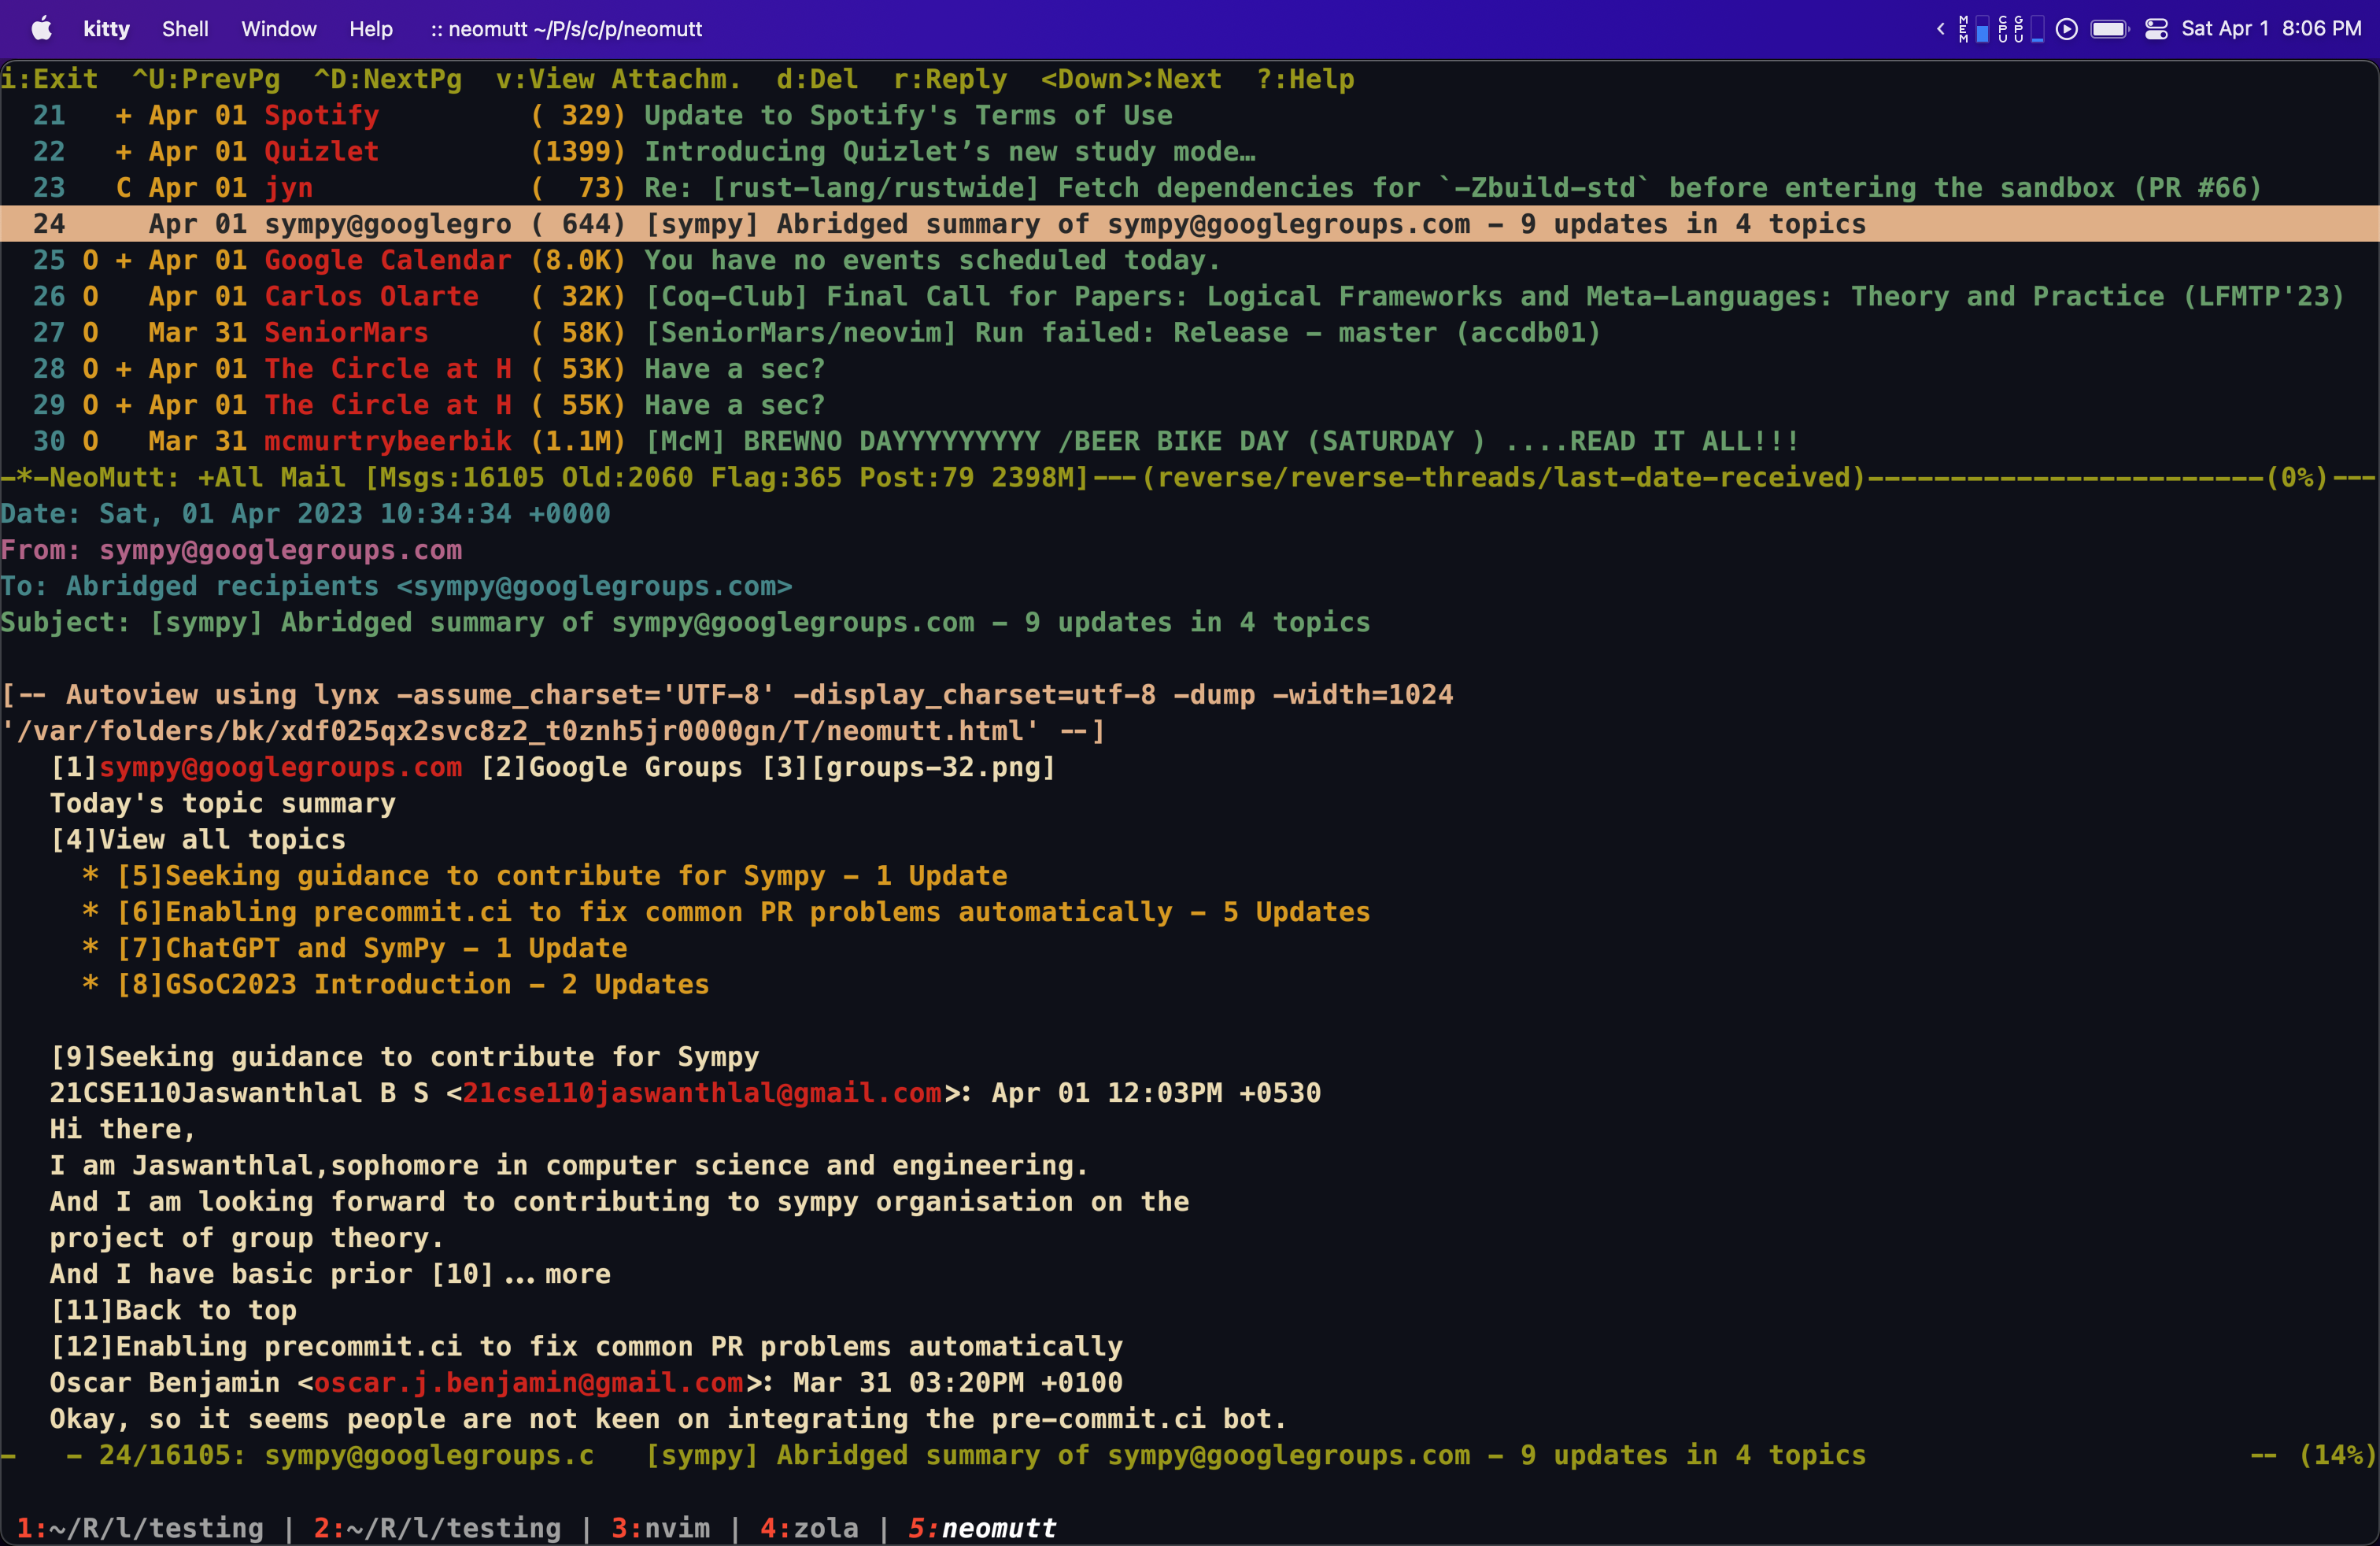
Here is an image with an email open:
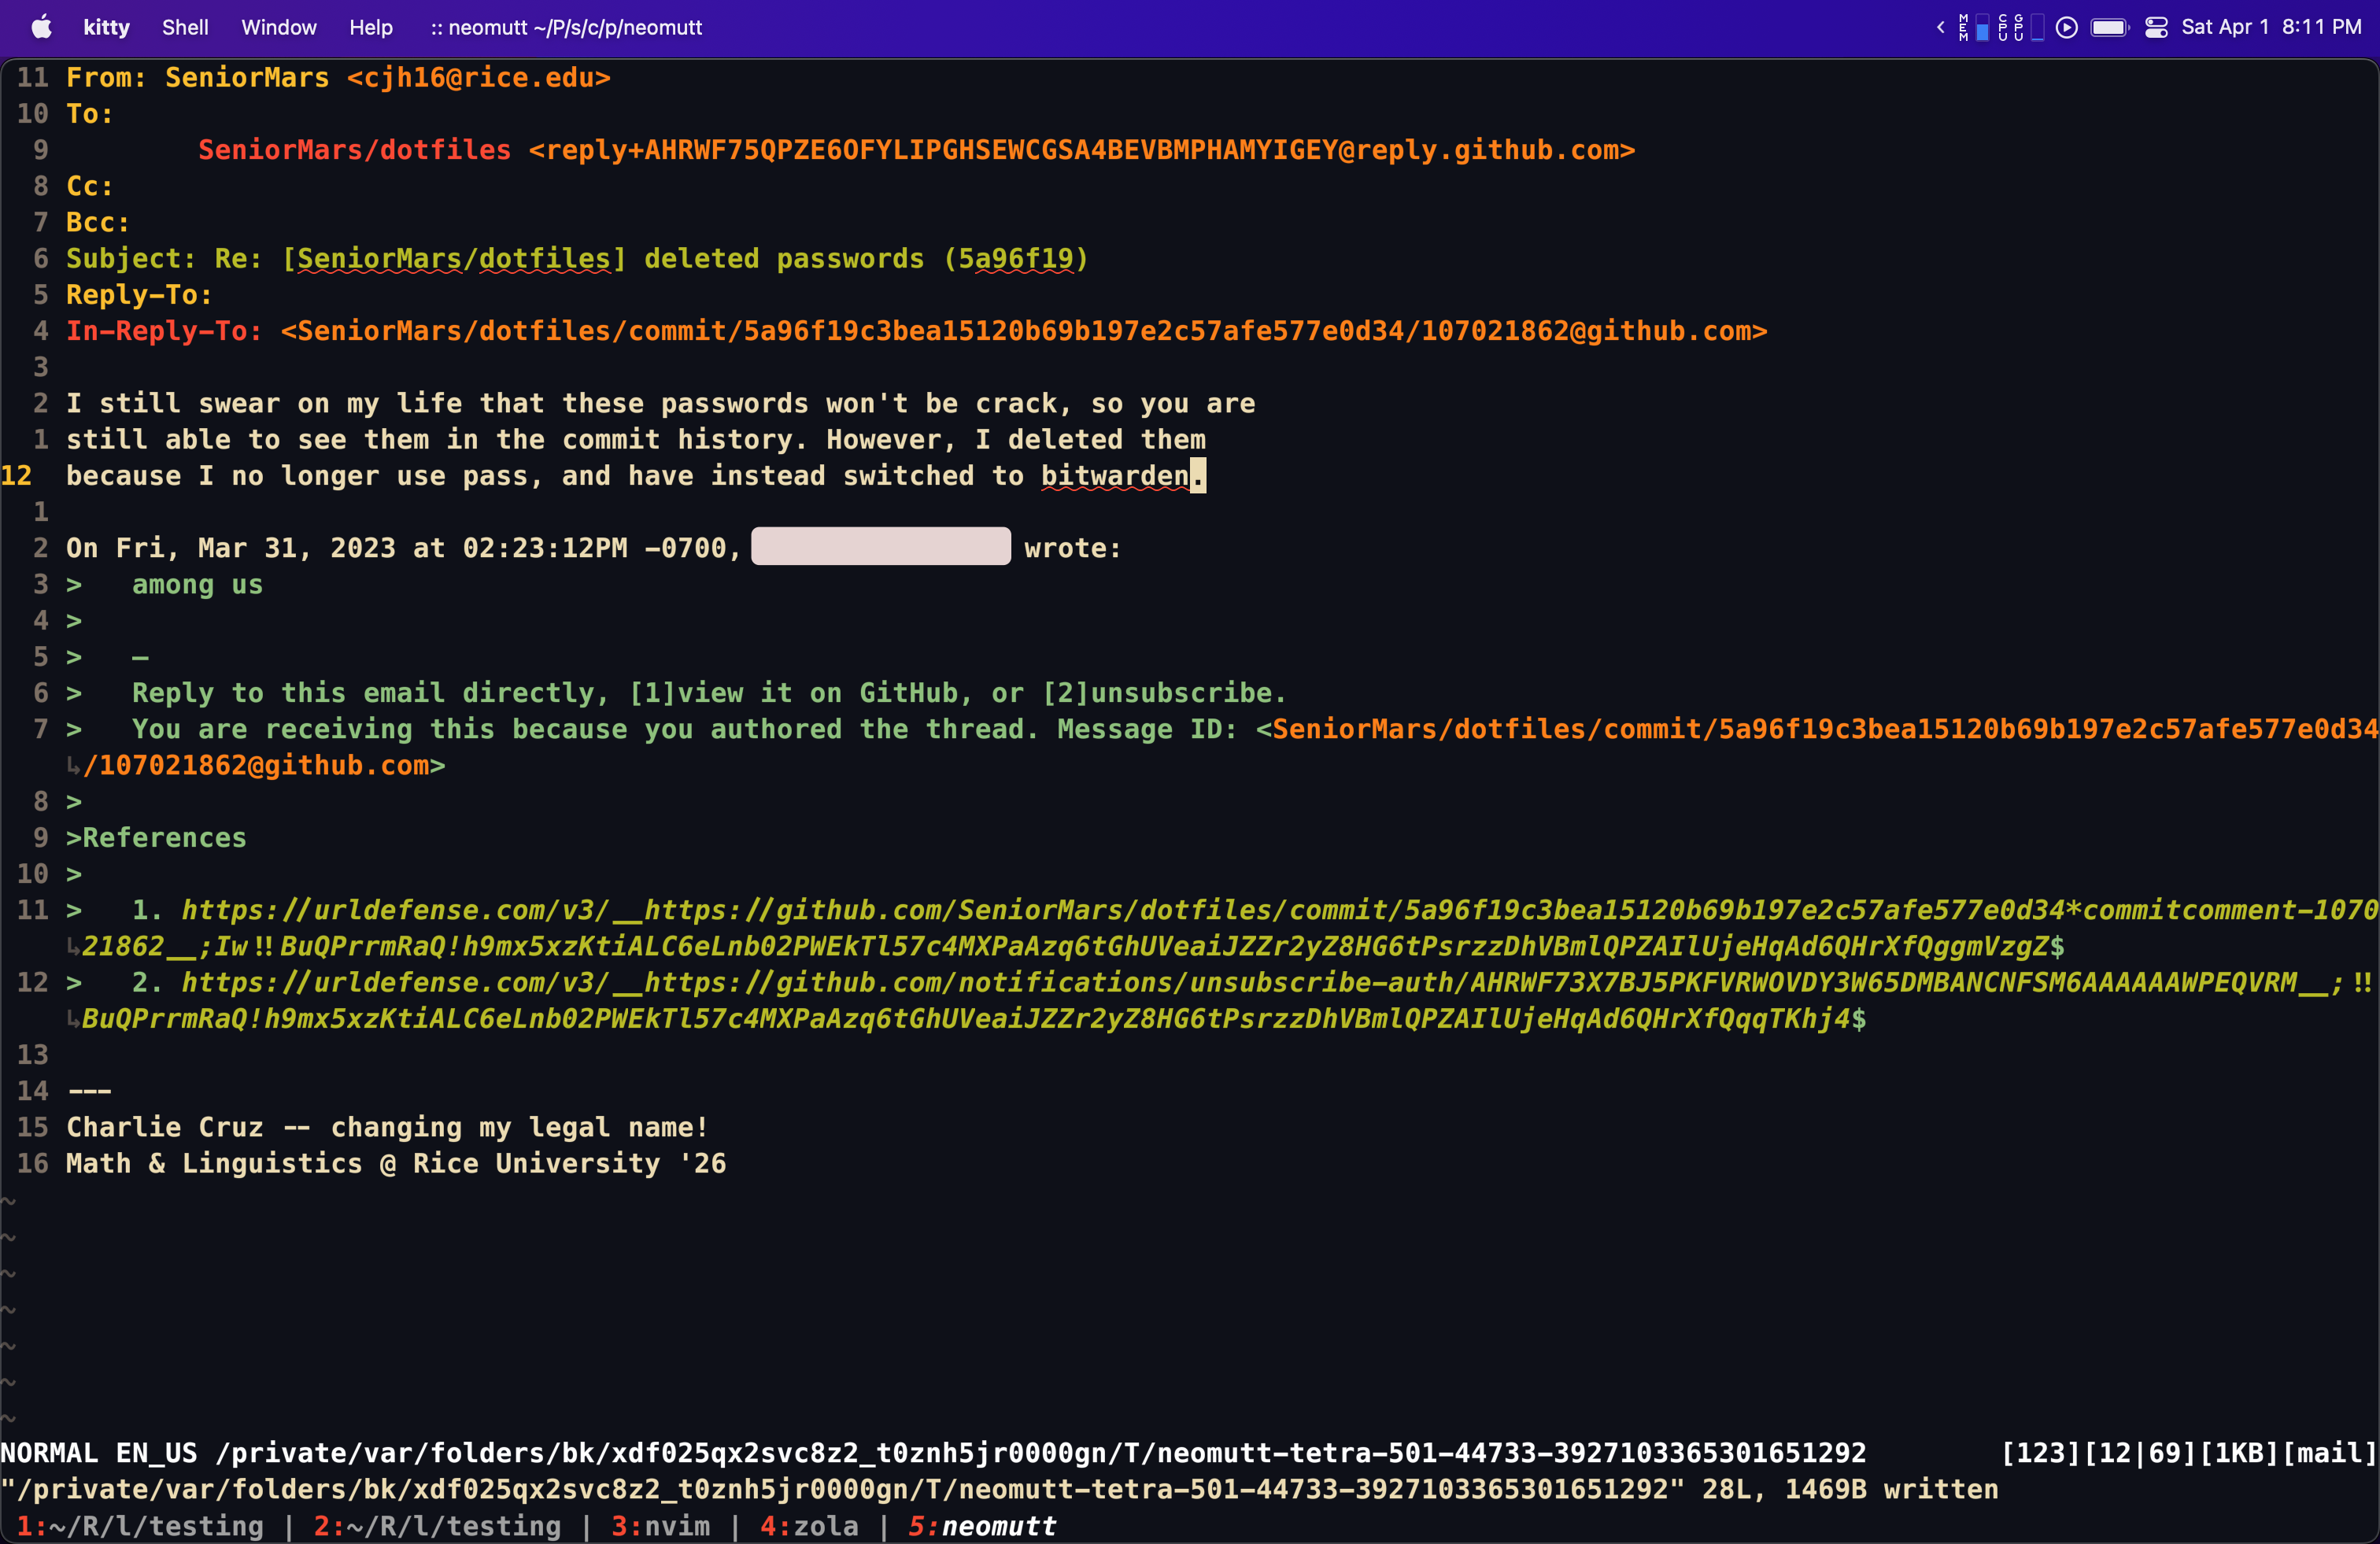
Finally, here is an image with a reply open (also s/crack/cracked):
At the end of this blog, I’ll show the configuration we came up with.
Introduction and WHY?
Ok, you have seen the images, but now you wonder: 1) what am I looking at? And 2) why would I want to use this? Let’s start with the first question. These images are of a terminal email client called Neomutt and it is my go-to email client. It supports all the basic email features that you would expect from an email client, plus way more! The second question is a bit more complex, as I cannot speak for everyone, but I will explain why I use Neomutt.
- Auto-image blocking: In the age where everyone is trying to get your attention, it is nice to have a client that doesn’t render images by default. Instead of those annoying images, I get a plain view of the email, and concentrate on the content of the email.
- Lightweight: Gmail is a resource hog. It takes seconds to load, and a pain to use when you have a slow internet connection. Neomutt loads in a fraction of a second and allows you filter through your emails quickly.
- Configurable: Neomutt is extremely configurable. You can change the color scheme, the keybindings, and even the email client’s behavior. For instance, In my current configuration, I have grammar checking, auto-completion for words, and auto-completion for email addresses. Everything is done through the keyboard.
Now, if none of these reasons appeal to you, then Neomutt is not for you. Click the back button. But, if you are still here, then let’s get started!
Installation
For this blog, I’ll be detailing the installation process for Arch Linux, Gentoo, Ubuntu, and macOS. Since I know these distributions extremely well, I can provide more detailed instructions. If you are using Windows, I recommend using WSL2, and you can follow along with the Ubuntu instructions.
macOS
I’ll be using Homebrew to install Neomutt:
$ is the prompt for a user without root access. You don’t need to type it.
$ /bin/bash -c "$(curl -fsSL https://raw.githubusercontent.com/Homebrew/install/HEAD/install.sh)"
$ # wait for the installation to finish and put homebrew in your path
$ # ...
$ brew install neomutt
$ # additionally, I would recommend installing:
$ brew install gnupg
$ # I'll explain why later
Arch Linux
$ sudo pacman -Syu neomutt
$ sudo pacman -Syu gnupg
$ # or
$ sudo paru -Syu neomutt
$ sudo paru -Syu gnupg
Gentoo
$ sudo emerge --ask mail-client/neomutt
$ sudo emerge --ask app-crypt/gnupg
Ubuntu and WSL2 using Ubuntu
$ sudo apt install neomutt
$ sudo apt install gnupg
Running Neomutt for the first time
The first time you run Neomutt, you will be greeted with a screen that looks like this that prompts you for your email address and password:
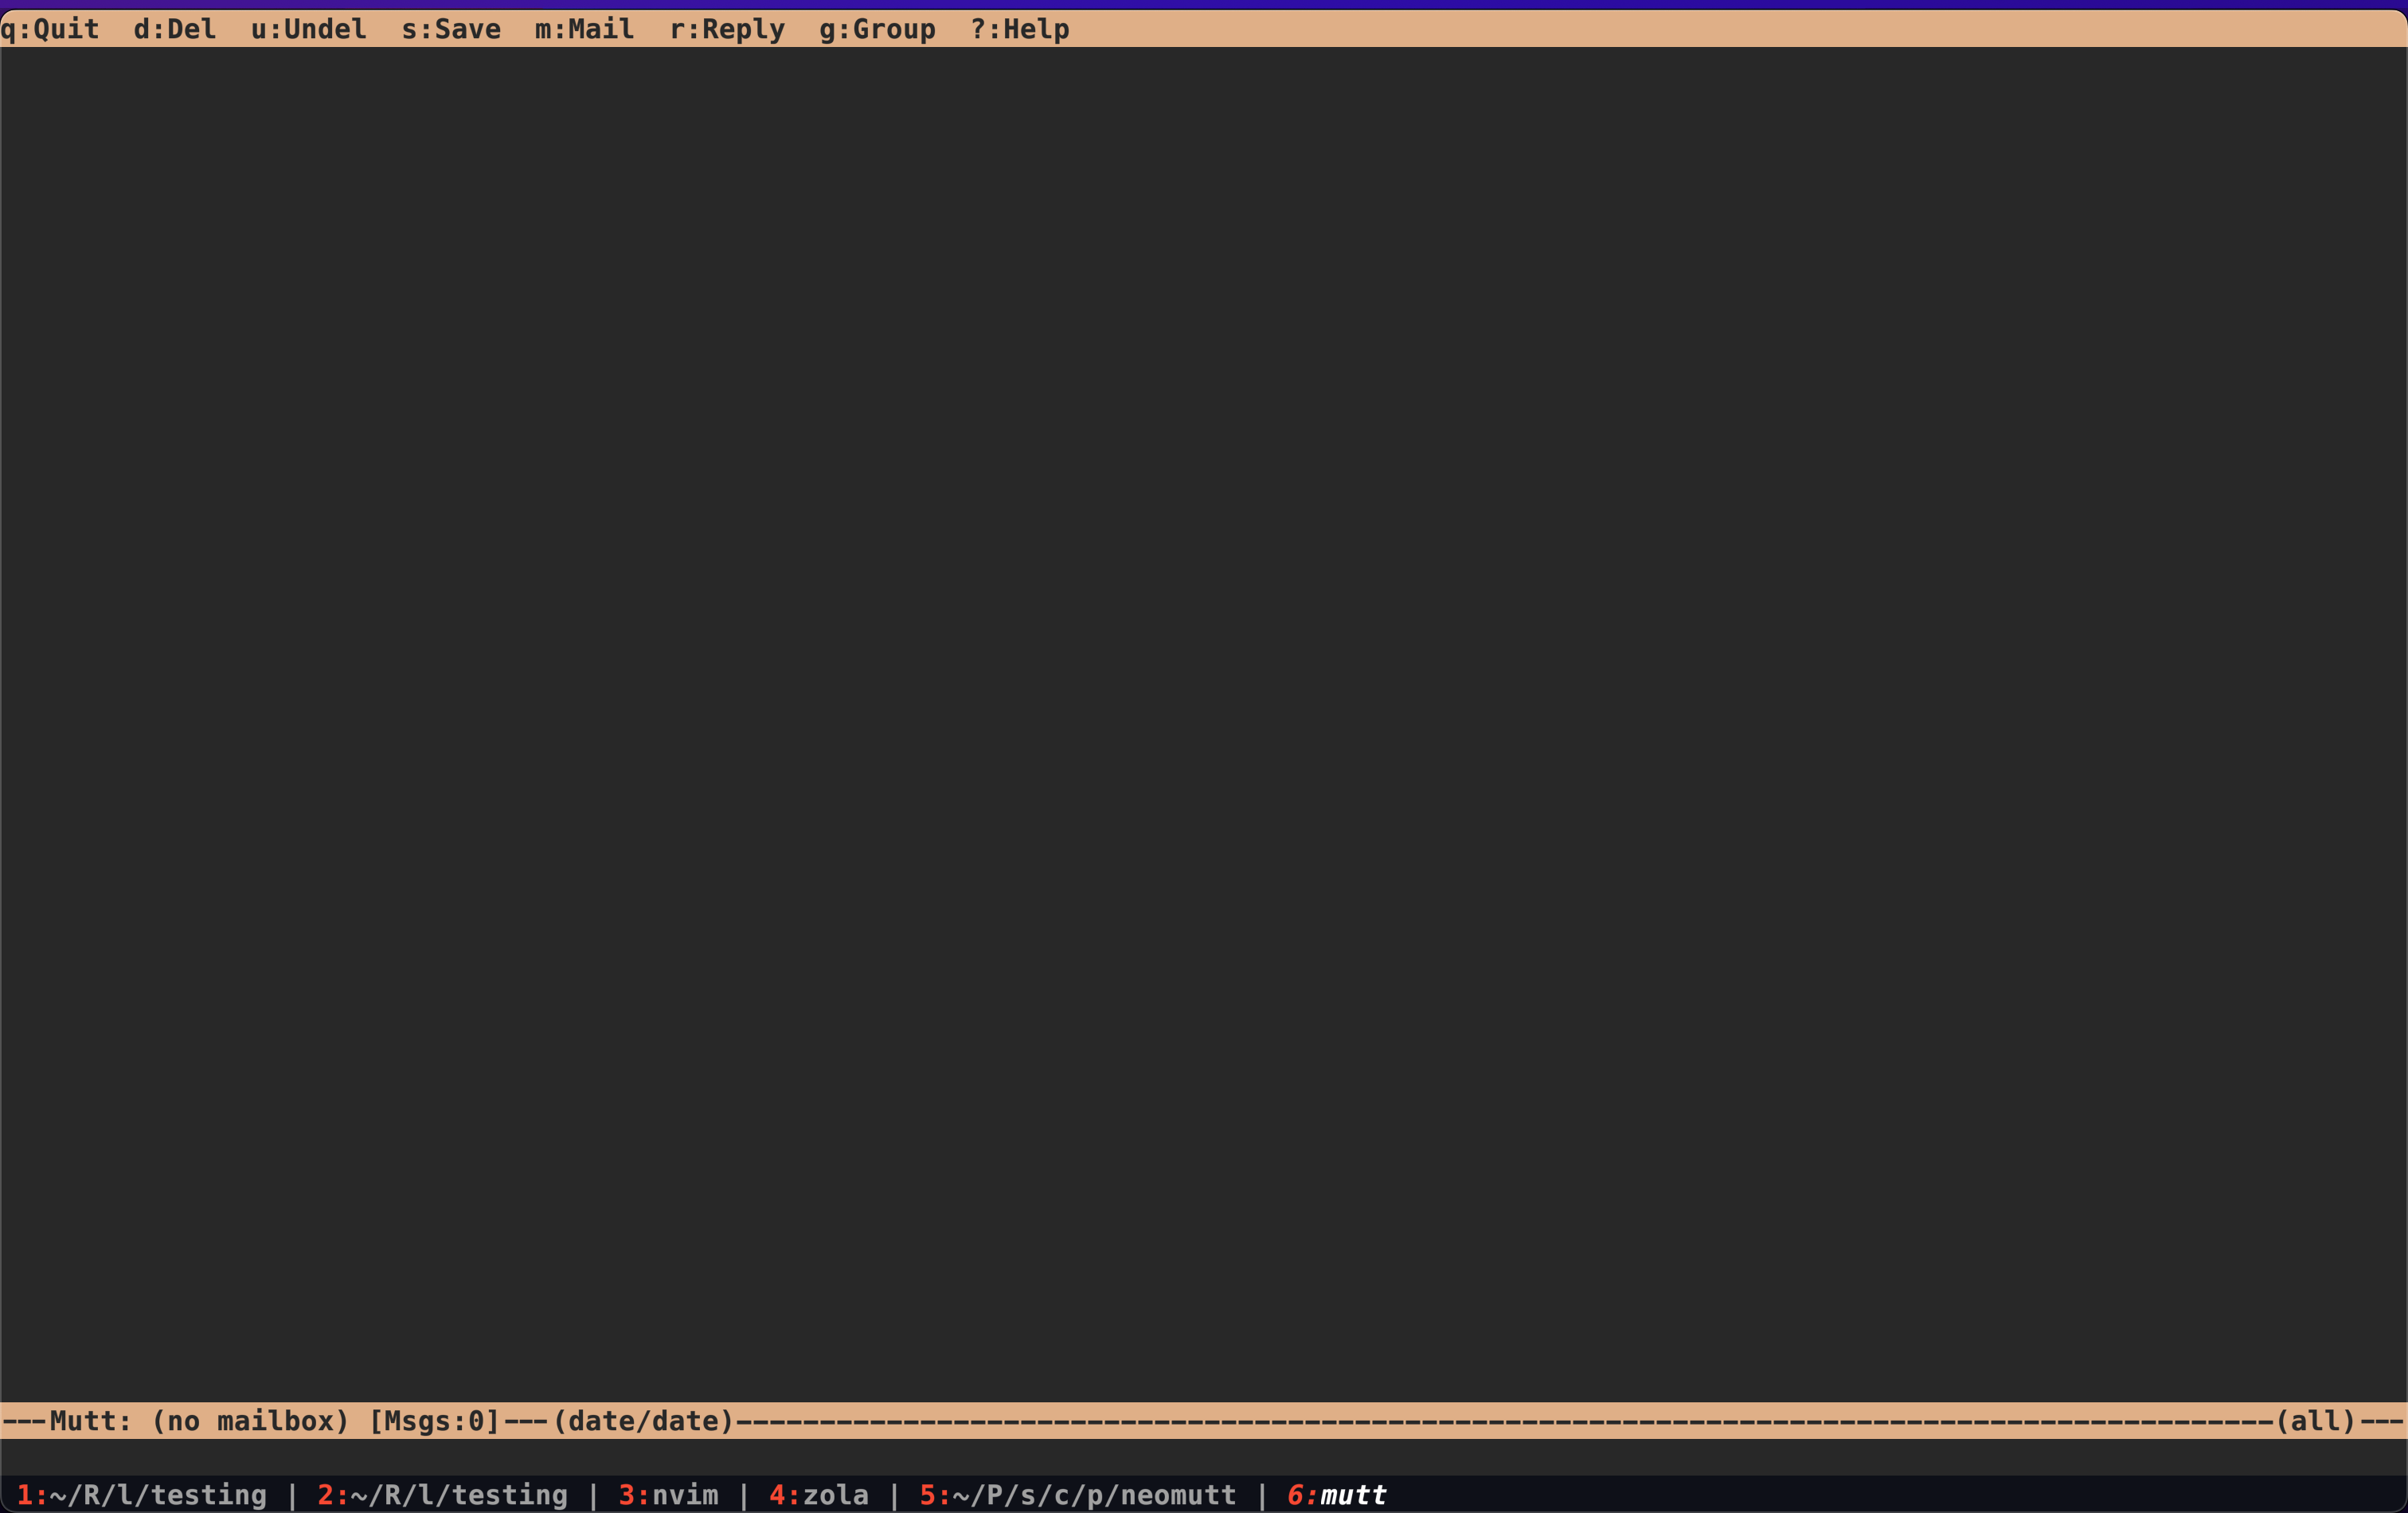
This is the default configuration that Neomutt comes with, but not very useful. We need to customize it first. To demonstrate how to configure Neomutt, I’ll have two code blocks for each section. The first code block will be the configuration that I use, and the second code block is the one you should modify to fit your needs.
Initial Mutt Configuration
We are going to take configuration step by step. I will explain what each section does, and why.
The first we need to do is make a muttrc file. This file is where we will store all of our configuration.
By default, Neomutt will look for a file called muttrc in the following location: XDG_CONFIG_HOME/mutt/muttrc.
$XDG_CONFIG_HOME is an environment variable that points to the location of your configuration files. Read more about it here.
For example, on my machine, the location of my muttrc file is ~/.config/mutt/muttrc.
If this file does not exist, then you can create it by running the following command:
$ mkdir -p ~/.config/mutt
$ touch ~/.config/mutt/muttrc
Let’s put a hold on this to introduce the next section:
Google, Gmail, and App-specific passwords
As I said before, this blog is intended for students that are forced to use Google’s email platform. Which means I’ll be detailing how to configure Neomutt to work with Gmail. Thus, before we move any further, it is important to get an “app-specific password” from Google.
An app-specific password is a password for applications that do not support 2-factor authentication or are considered ‘unsecure’. Google wants you to use Gmail >:(
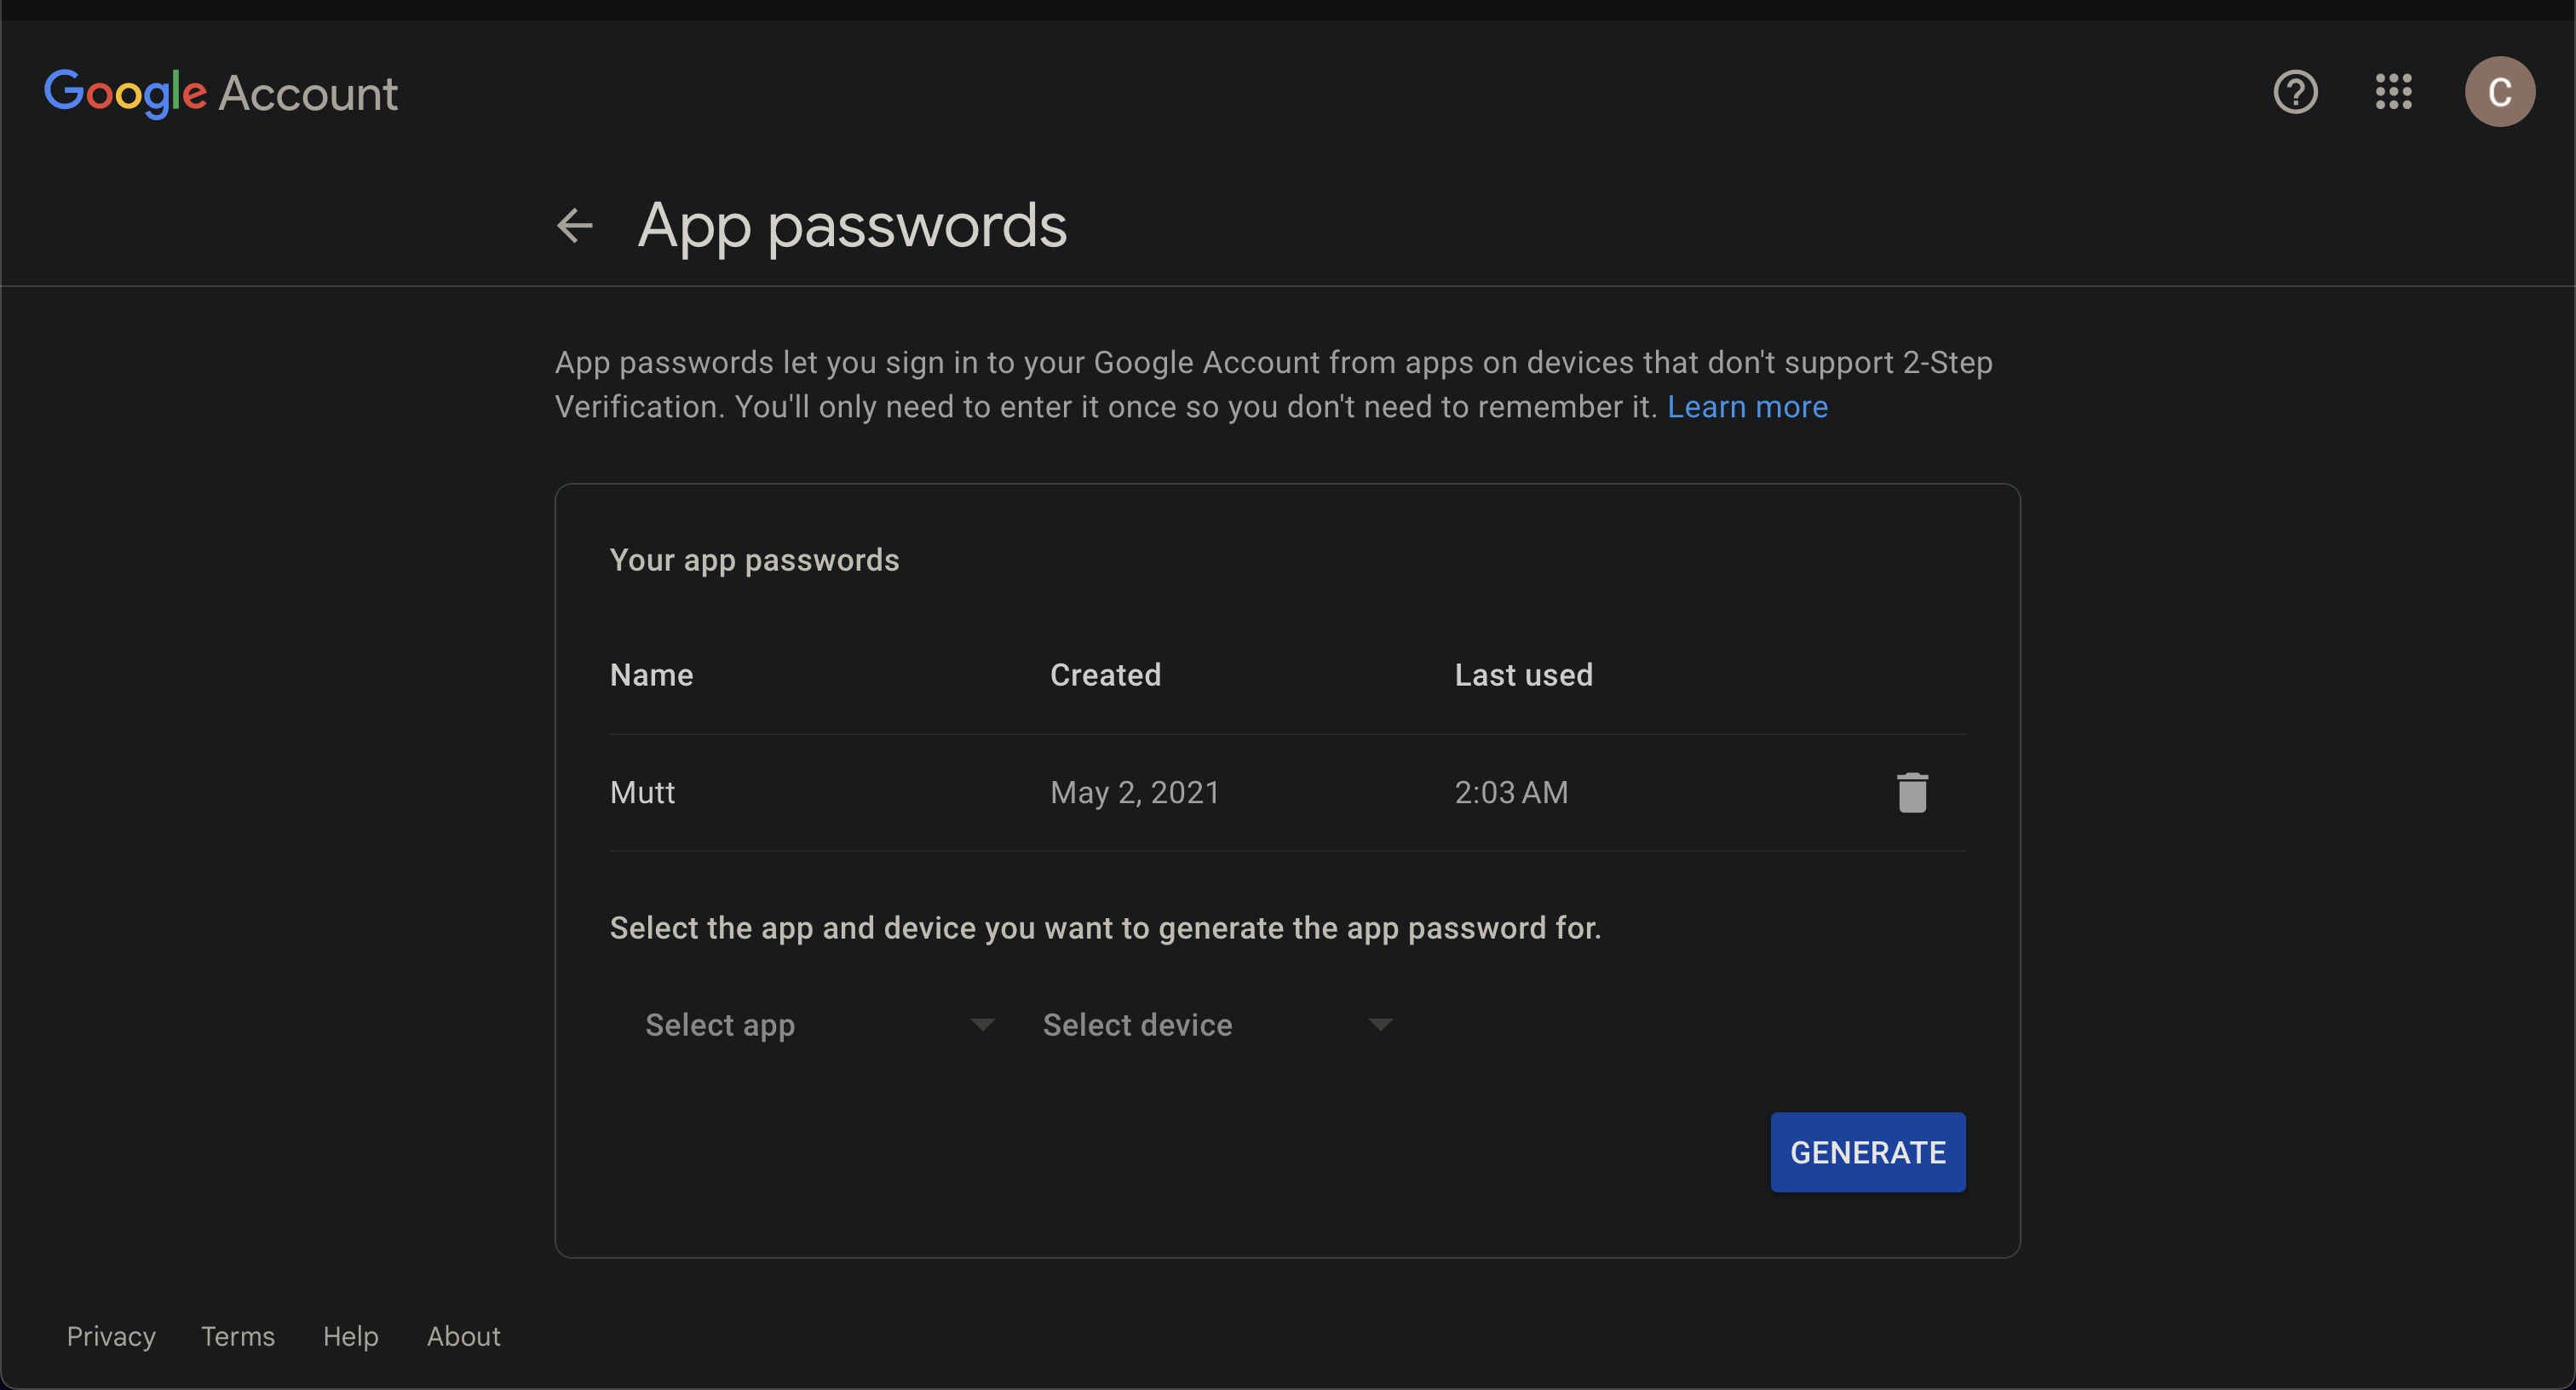
To get an app-specific password, follow these steps:
- Go to Google’s app-specific password page
- Sign in with your Google account
- Select “Mail” as the app or other and select “Other (custom name)” as the device. I use “Mutt” as the name.
- Click “Generate” and copy the password that is generated. You will need this password later. Store it!
- Profit??!!!
Here is a screenshot of the result:
Accessing Gmail with Neomutt
Now that we have an app-specific password, we can configure Neomutt to access Gmail. To accomplish this,
let’s open up our muttrc (i.e., $EDITOR XDG_CONFIG_HOME/mutt/muttrc) file with our favorite editor. I’ll be using nvim for this blog, but
you can use any editor you want. Now, let’s add the following configuration to our muttrc file:
Mine:
# User
set from = "[email protected]"
set realname = "Charlie Cruz"

# Gmail
set imap_user = "[email protected]"
set smtp_url = "smtps://[email protected]@smtp.gmail.com:465/"
set smtp_authenticators = 'gssapi:login'
set imap_pass = "my_app_specific_password"
set smtp_pass = "my_app_specific_password"

# Ensure TLS is enforced
set ssl_starttls = yes
set ssl_force_tls = yes
Yours:
# User
set from = "your_email_address"
set realname = "Your Name"

# Gmail
set imap_user = "your_email_address"
set smtp_url = "smtps://[email protected]:465/"
set smtp_authenticators = 'gssapi:login'
set imap_pass = "your_app_specific_password"
set smtp_pass = "your_app_specific_password"

# Ensure TLS is enforced
set ssl_starttls = yes
set ssl_force_tls = yes
Plain text for passwords is a bad idea. See the encryption section of this blog.
Let’s break down this section:
First, it’s pretty self-explanatory for the first few lines, but for set smtp*, we need to
explain.
set smtp_url is the URL that Neomutt will use to send emails. The format is as follows:
smtps://email@server:port. For Gmail, the server is smtp.gmail.com and the port is 465. This
is from the Gmail SMTP server documentation.
set smtp_authenticators is the authentication method that Neomutt will use to send emails. For
Gmail, we will use gssapi:login as the authentication method.
set imap_pass and set smtp_pass are the passwords that Neomutt will use to access your email.
Note this is plaintext, we will fix this later.
set ssl_starttls and set ssl_force_tls are used to ensure that Neomutt uses TLS when connecting
to the server. This is important because Gmail will not allow you to connect to the server without
these properties.
After you have added this configuration to your muttrc file, save it, and in theory, you
can now access your email! But, there are a few more things we need to do to make this more useful.
Mailboxes
The next step is to specify which mailboxes you want to access. To achieve this, we add:
# My mailboxes
set folder = "imaps://imap.gmail.com:993/[Gmail]"
set spoolfile = "+All Mail"
set postponed = "+Drafts"
set record = "+Sent Mail"
set trash = "+Trash"

mailboxes =Important =Starred =Drafts ="Sent Mail" =Spam =Trash

# Where to put the stuff
set header_cache = "$XDG_CACHE_HOME/mutt/headers"
set message_cachedir = "$XDG_CACHE_HOME/mutt/bodies"
set certificate_file = "$XDG_CACHE_HOME/mutt/certificates"
unset record
Let’s break this down:
set folderis the folder that Neomutt will use to access your emails. 993 is just the port for imap.set spoolfileis your home inbox. This is the inbox that you see when you log into Gmail. You can change this to whatever you want. i.e.,set spoolfile = "+Important". I like to see all my emails, so I use+All Mail.set record,set postponed, andset trashare the folders that Neomutt will use to store emails that you have sent, drafts, and trash respectively in Gmail.mailboxesis a list of mailboxes that you want to access. You can add as many as you want, but I keep it simple with just the ones I use.set header_cacheandset message_cachedirare the locations that Neomutt will use to cache your emails. This is important because it will make your email client much faster.set certificate_fileis similar.unset recordis used to disable the recording of sent emails. This is because Gmail already records sent emails, so we don’t need to do it twice.
At this point, you should be able to access your email! Now, let’s make this even more useful.
Settings I highly recommend
Alright, so now that we have a basic configuration, but what about modifying how we reply to emails,
or how we interact with our email client? Let’s add the following to our muttrc file:
I added comments to explain what each line does.
# settings
set pager_index_lines = 10
set pager_context = 3                # show 3 lines of context
set pager_stop                       # stop at end of message
set menu_scroll                      # scroll menu
set tilde                            # use ~ to pad mutt
set move=no                          # don't move messages when marking as read
set mail_check = 30                  # check for new mail every 30 seconds
set imap_keepalive = 900             # 15 minutes
set sleep_time = 0                   # don't sleep when idle
set wait_key = no		     # mutt won't ask "press key to continue"
set envelope_from                    # which from?
set edit_headers                     # show headers when composing
set fast_reply                       # skip to compose when replying
set askcc                            # ask for CC:
set fcc_attach                       # save attachments with the body
set forward_format = "Fwd: %s"       # format of subject when forwarding
set forward_decode                   # decode when forwarding
set forward_quote                    # include message in forwards
set mime_forward                     # forward attachments as part of body
set attribution = "On %d, %n wrote:" # format of quoting header
set reply_to                         # reply to Reply to: field
set reverse_name                     # reply as whomever it was to
set include                          # include message in replies
set text_flowed=yes                  # correct indentation for plain text
unset sig_dashes                     # no dashes before sig
unset markers

# Sort by newest conversation first.
set charset = "utf-8"
set uncollapse_jump
set sort_re
set sort = reverse-threads
set sort_aux = last-date-received
# How we reply and quote emails.
set reply_regexp = "^(([Rr][Ee]?(\[[0-9]+\])?: *)?(\[[^]]+\] *)?)*"
set quote_regexp = "^( {0,4}[>|:#%]| {0,4}[a-z0-9]+[>|]+)+"
set send_charset = "utf-8:iso-8859-1:us-ascii" # send in utf-8
I highly recommend these settings, but you may want to change askcc, edit_headers, fast_reply, envelope_from.
Sidebar
The sidebar is a very useful feature that allows you to see all your mailboxes in a sidebar. Here is a screenshot of what it looks like:
Here is how to add it to your muttrc file:
#sidebar
set sidebar_visible # comment to disable sidebar by default
set sidebar_short_path
set sidebar_folder_indent
set sidebar_format = "%B %* [%?N?%N / ?%S]"
set mail_check_stats
bind index,pager \CJ sidebar-prev
bind index,pager \CK sidebar-next
bind index,pager \CE sidebar-open
bind index,pager B sidebar-toggle-visible
Now, you should be able to see the sidebar when you open your email client and press <shift-b> to toggle it!
Signature
The signature is the text that you add to the bottom of your emails. To add it to Neomutt, you need to:
- Create a file (call it
signatureor whatever you prefer) - Add your signature to the file. For example, here is mine:
$ cat signature

---
Charlie Cruz -- changing my legal name!
Math & Linguistics @ Rice University '26
- link the file to your
muttrcfile:
set signature = "$XDG_CONFIG_HOME/mutt/signature"
Now, when you send an email, your signature will be added to the bottom of the email.
Editor
The editor is the program that you use to compose emails. By default, Neomutt uses vi as the editor, but you can change this to whatever you want. For instance, I use nvim as my editor, so I add the following to my muttrc file:
set editor = "nvim"
In (Neo)Vim with patch 6e649224926b and partial 113cb513f76d now include mail.vim, which is a filetype plugin for mail. This plugin provides syntax highlighting, indentation, and other features for mail files.
(N)vim and Mail
If you use nvim as your editor, you may want to add the following to your nvim/after/ftplugin/mail.{lua,vim} file:
Lua:
vim.opt_local.spell = true
vim.opt_local.spelllang = 'en_us'
vim.opt_local.fo:append('aw')
local map = vim.api.nvim_buf_set_keymap
local options = { noremap = true, silent = true}
map(0, 'n', '<leader>x', 'ZZ', options)
Vim:
setlocal spell
setlocal spelllang=en_us
setlocal fo+=aw
nnoremap <leader>x ZZ
These settings will enable spell checking, better paragraph wrapping, and <leader>x will save and quit.
Keybindings
I highly recommend adding the following keybindings to your muttrc file for more vim-like keybindings:
macro index A \
    "<tag-pattern>~N<enter><tag-prefix><clear-flag>N<untag-pattern>.<enter>" \
    "mark all new as read"

bind index j next-entry
bind index k previous-entry
bind pager j next-line
bind pager k previous-line

bind attach,index,pager \CD next-page
bind attach,index,pager \CU previous-page
bind pager g top
bind pager G bottom
bind attach,index g first-entry
bind attach,index G last-entry
The first marco isn’t very vim-like, but it is very useful. It allows you to mark all new emails as read by pressing A in the index.
The next set of keybindings are for scrolling. I use j and k to scroll up and down, and g and G to go to the top and bottom of the page.
Mailcap
The mailcap file is used to determine how to open attachments. For instance, if you have a .pdf
file, you would want to open it with your prefer PDF viewer. This is most useful for rendering HTML
in emails.
- Create a file called
mailcapin your$XDG_CONFIG_HOME/muttdirectory. - Add the following to the file:
text/html; firefox %s; test=test -n "$display"; needsterminal;
text/html; lynx -assume_charset=%{charset} -display_charset=utf-8 -dump -width=1024 %s; nametemplate=%s.html; copiousoutput;
text/plain; cat %s; copiousoutput
application/pdf; firefox %s; test=test -n "$display"; needsterminal;
Of course, you can change the browser, and pdf viewer to whatever you want. On Mac, you might want
open -a firefox %s or open -a Preview %s.
Firefox now supports editing PDFs!
- Now install
lynx
macOS
$ brew install lynx
Arch Linux
$ sudo pacman -Syu lynx # or paru -Syu lynx
Gentoo
$ sudo emerge -av www-client/lynx
Ubuntu
$ sudo apt install lynx
- Link the file to your
muttrcfile and add the following to yourmuttrcfile:
# link to mailcap file
set mailcap_path = "$XDG_CONFIG_HOME/mutt/mailcap"
# open attachments with mailcap with <return>
bind attach <return> view-mailcap
# save attachments to a folder
macro attach s '<save-entry> <bol>~/Documents/attachments/<eol>' 'save attachment'
auto_view text/html		# automatically show html (mailcap uses lynx)
You can see more mailcap examples in my dotfiles here.
Now you should be able to open attachments with your prefered program and automatically render HTML in emails! NO PICTURES THOUGH :)
Colors
You can change the colors of Neomutt by adding the following to your muttrc file:
color status green default
# in general, the order is:
# color <element> <color> <attr> optional<regex>
My theme can be found here.
External programs
While, Neomutt is a great email client, it is not perfect. For instance, it doesn’t have a built-in query support, urls are not clickable, and it doesn’t encrypt emails. To resolve these issues, we can use external programs.
Urlscan
Let’s take a look at the first issue: urls are not clickable. To fix this, we can use urlscan to make urls clickable.
The GitHub repo for urlscan is here, and you can install it
via pip:
$ pip install --user urlscan
Now, we need to add the following to our muttrc file:
macro index,pager \cb "<pipe-message> urlscan<Enter>" "call urlscan to extract URLs out of a message"
macro attach,compose \cb "<pipe-entry> urlscan<Enter>" "call urlscan to extract URLs out of a message"
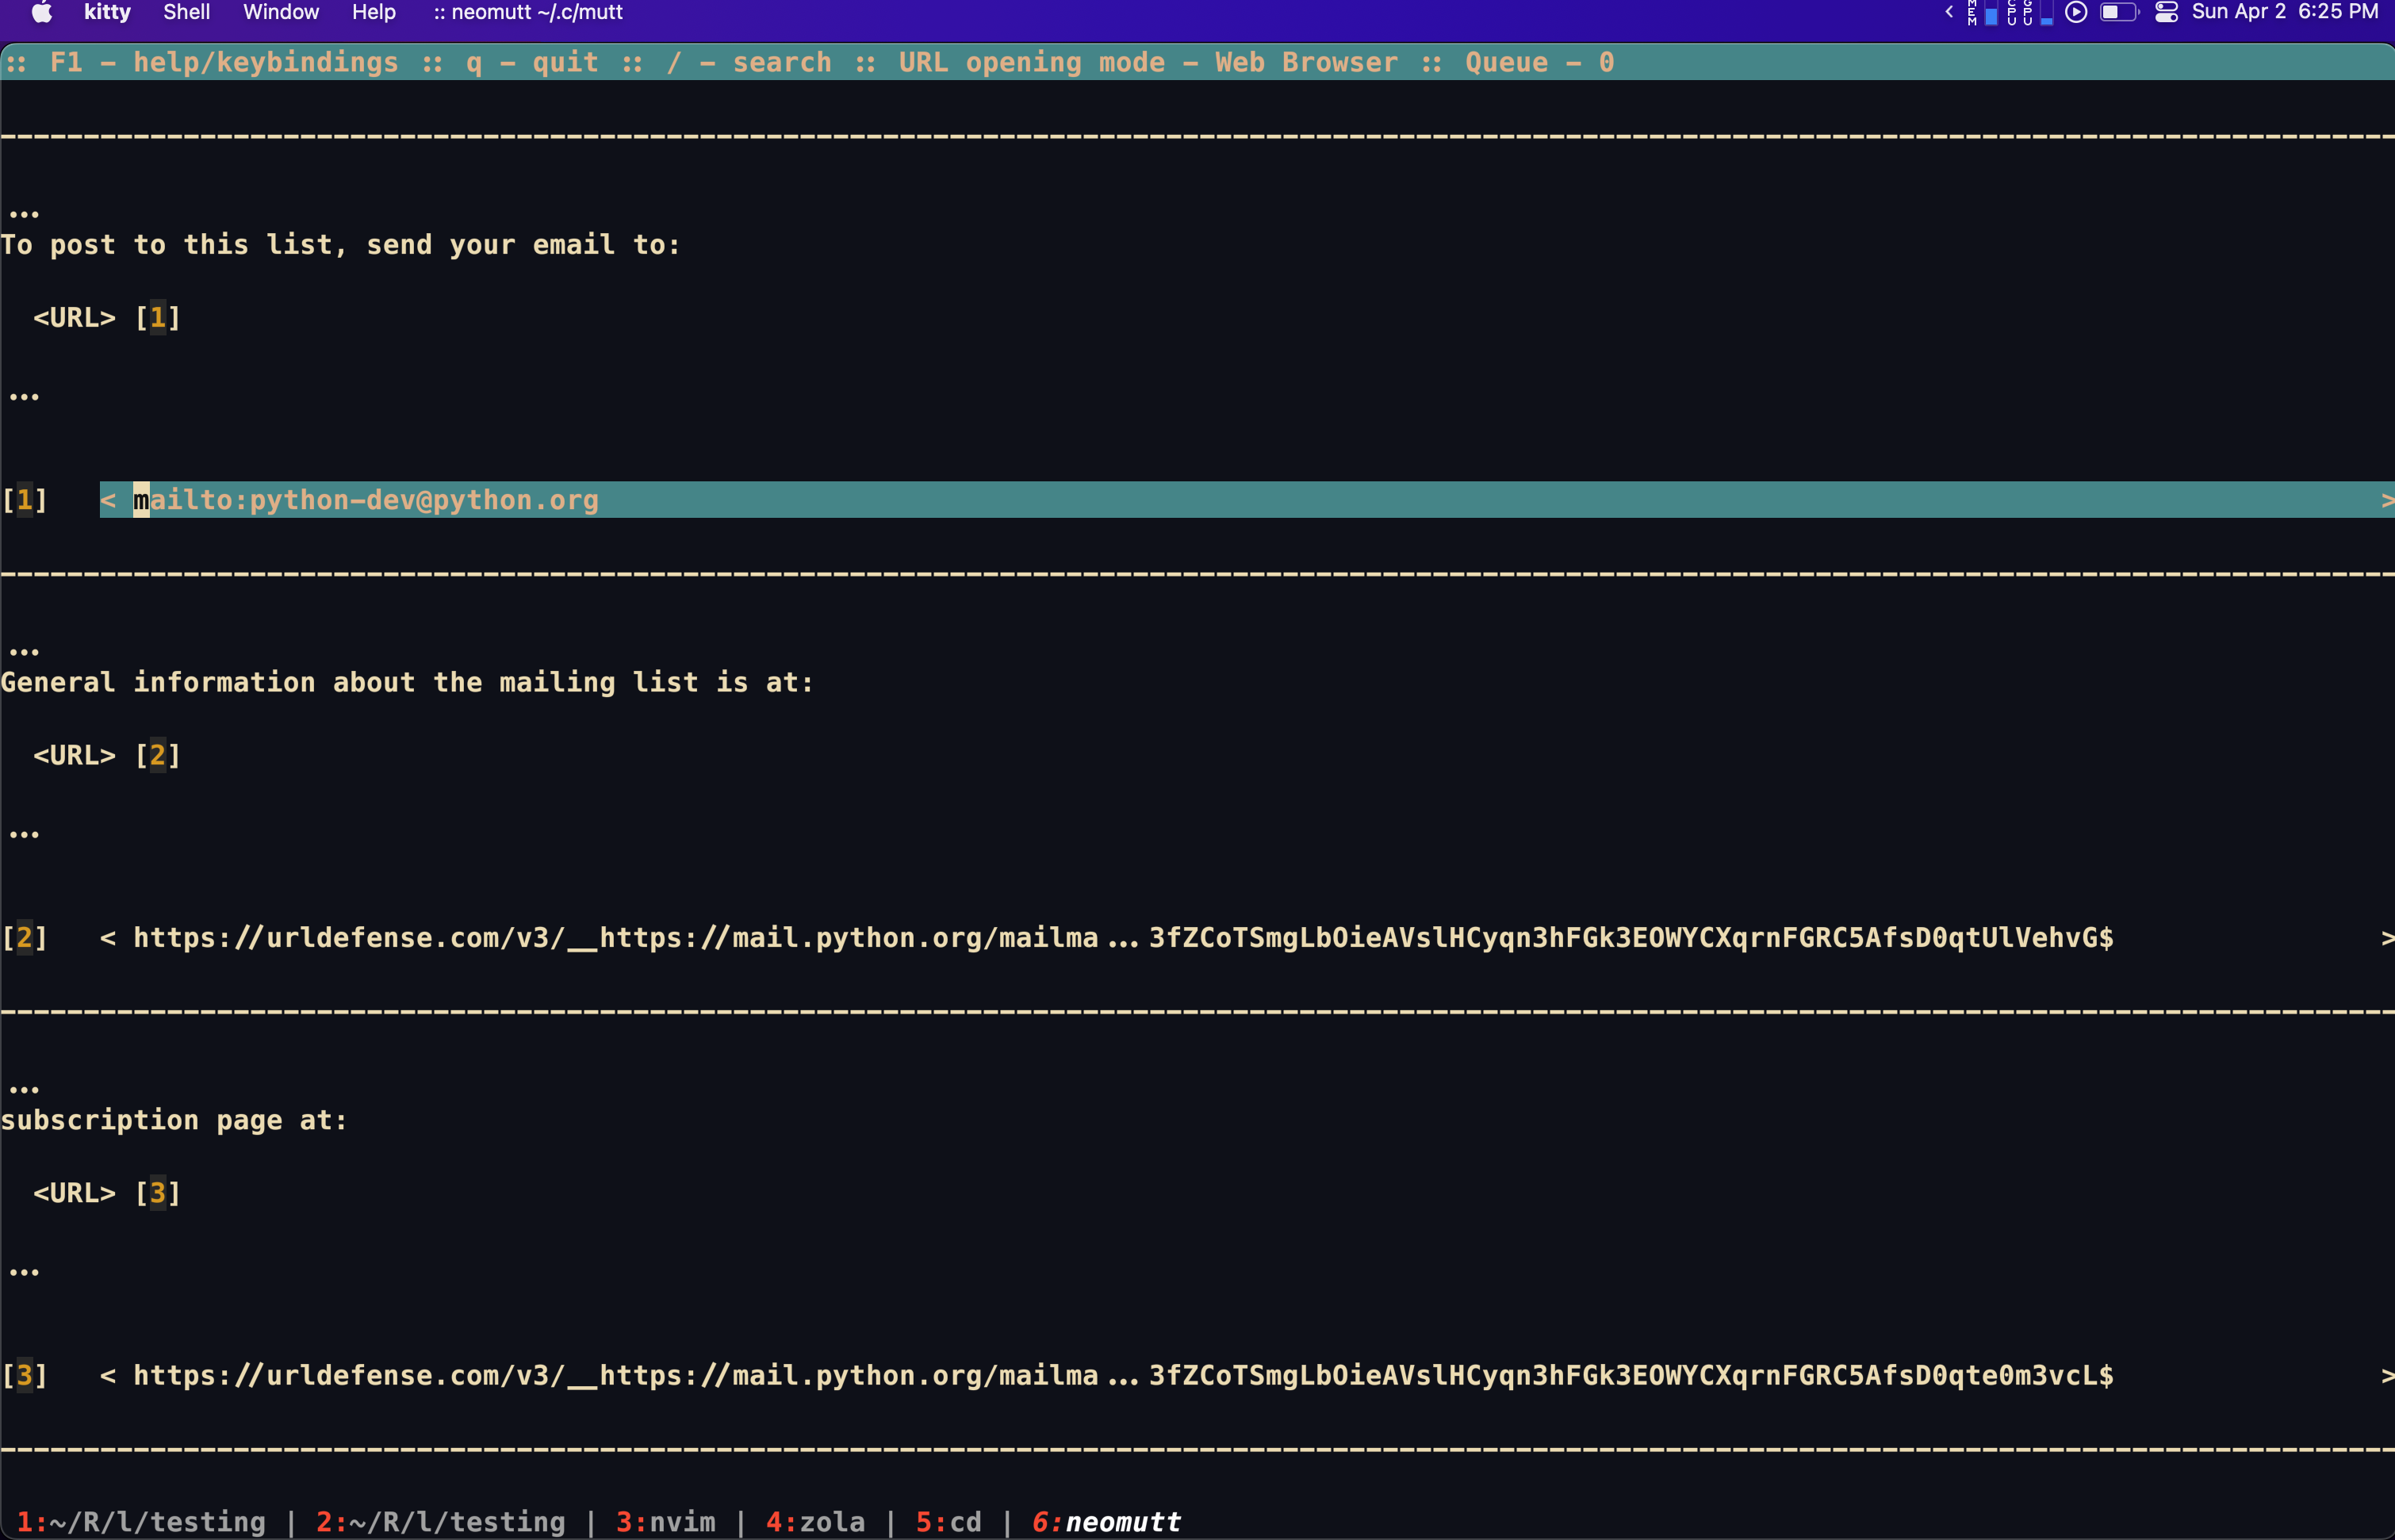
Now, when you press <Ctrl+b> in the index or pager, urlscan will be called and the urls will be
extracted. You can then press <Enter> to open the url in your browser.
See image below:
Query
The next issue is that Neomutt doesn’t have a built-in query support. To fix this, we can use
goobook to search our contacts or lbdbq to use apple’s address book.
For goobook, I recommend looking at archlinux’s wiki for more information. It basically comes down to getting a token from Google.
Since, I currently use macOS, I will show you how to use lbdbq to search my contacts.
- Install
lbdbq:
$ brew install lbdbq
- Modify
lbdbq’s config file (either$HOME/.lbdbrcor/opt/homebrew/Cellar/lbdb/0.51.1/etc/lbdb.rc) to include the following:
METHODS="m_inmail m_osx_addressbook m_muttalias"
You are done!
- Add the following to your
muttrcfile:
set query_command="/opt/homebrew/bin/lbdbq '%s'"
bind editor <Tab> complete-query
Now, when you press <Tab> in the editor when prompted for an email, you will be able to search your MacBook contacts!
You can add your Google contacts to your MacBook contacts by linking your Google account to your MacBook contacts. Which is not great, but I still did it.
Encrypt
I use gpg to encrypt my emails. This is very useful for GitHub, and other services that require security. This is especially useful on mailing lists where you need to verify information. I find that everyone in the Arch Linux Mailing list uses it!
- We already installed
gpgin the beginning, so we are good to go! - Create a key and follow the instructions that are prompted:
$ gpg --full-generate-key
- Copy your public key:
$ gpg --list-secret-keys --keyid-format=long
For instance, my public key is: 7C668A6D13D5729989FB126B183357B41320BB2B. You can see the full
version here: https://github.com/SeniorMars.gpg
- Add the following to your
muttrcfile:
# Use GPGME
# Use my key for signing and encrypting
set pgp_default_key = 7C668A6D13D5729989FB126B183357B41320BB2B

# Use GPGME
set crypt_use_gpgme = yes

# Automatically sign all out-going email
set crypt_autosign = yes

# Sign replies to signed emails
set crypt_replysign = yes

# Encrypt replies to encrypted emails
set crypt_replyencrypt = yes

# Encrypt and sign replies to encrypted and signed email
set crypt_replysignencrypted = yes

# Attempt to verify signatures automatically
set crypt_verify_sig = yes

# Attempt to encrypt automatically, if possible
# I would recommend setting this to no as university often have spam filters
# And this will cause your emails to be marked as spam
# as they can't decrypt your emails LMAO
set crypt_opportunistic_encrypt = no

# So you can view encrypted emails automatically
auto_view application/pgp-encrypted
- Plaintext is a bad idea, which is why we are going to use GPG to encrypt our passwords.
In your muttrc delete the following lines:
set imap_pass = "my_app_specific_password"
set smtp_pass = "my_app_specific_password"
Now go to your terminal and create a file called passwords in your muttrc directory and add
the lines you just deleted.
Now, encrypt the file:
$ gpg --encrypt -r YOUR_GPG_KEY passwords
You should end up with a file called passwords.gpg in your muttrc directory.
Now, add the following to your muttrc file:
source "gpg -dq $XDG_CONFIG_HOME/passwords.gpg |"
Remove the plaintext passwords file.
$ shred -u passwords
Now, you have encrypted your passwords!
Image below (notice the Good signature and The following data is signed):
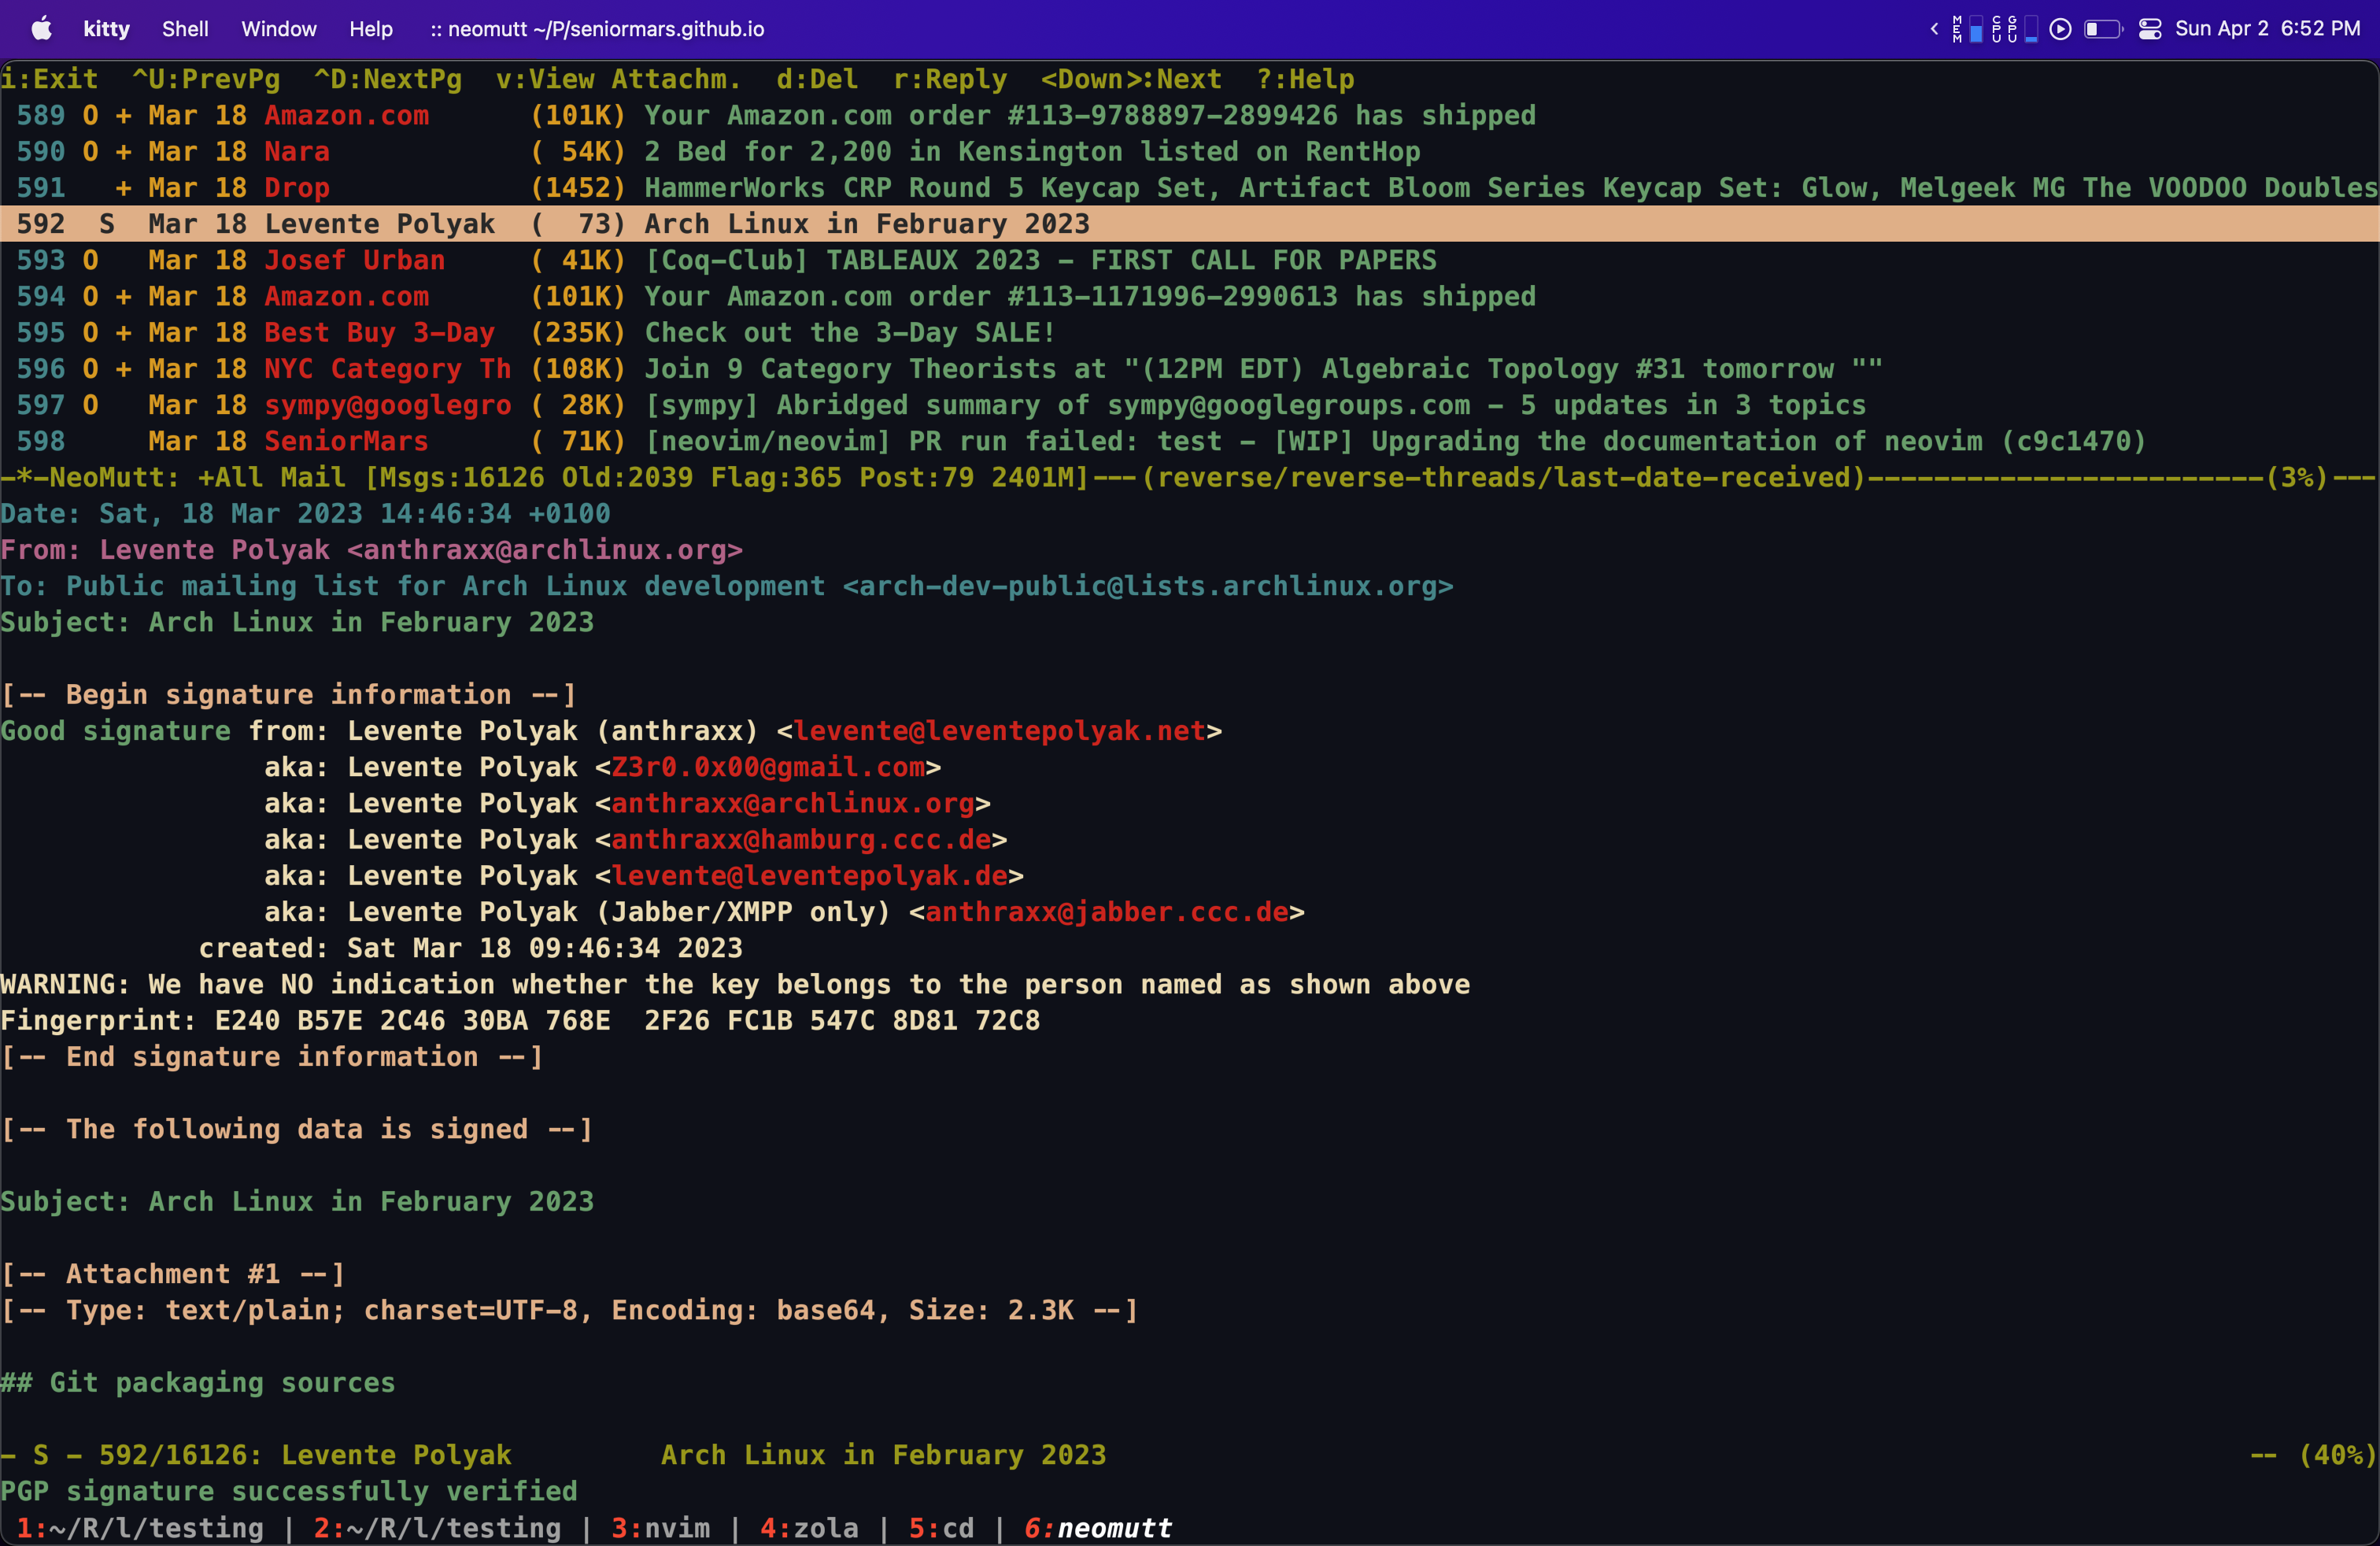
And that’s it! You should now have a fully functional email client!
Update
New Tools
Recently, I have changed my setup to use isync and msmtp to handle my email. Before this (and the original blog), we needed to have an open connection to Gmail to check for new emails. This was not ideal, as it would prevent us from reaching the speeds that neomutt can reach. Now, with isync and msmtp, I can browse my emails locally and only connect to Gmail when I want to send an email. This is awesome if you aim to limit your connection to Gmail.
isync
isync is a command-line tool that synchronizes your mailbox in a local directory with a remote IMAP server, allowing you to manage your email locally. This is particularly beneficial for users who prefer not to maintain a constant connection to their email server.
Installation
As isync requires a constant connection to your email server, you need to again create an app-specific password from google. If you need a reminder on how to do this, see the Google, Gmail, and App-specific passwords section.
macOS
$ brew install isync # or at least we hope this would work
All of this info comes from the com4.
$ brew install cyrus-sasl libtool
$ # Build this xoauth2 plugin against cyrus-sasl
$ git clone https://github.com/moriyoshi/cyrus-sasl-xoauth2.git
$ cd cyrus-sasl-xoauth2
$ vim autogen.sh
Change libtoolize to glibtoolize, otherwise you’ll get a libtoolize not found error. I’m unsure if this warrants a patch.
1c1
< libtoolize
---
> glibtoolize
Then we run the command as normal:
$ ./autogen.sh \
  && ./configure --with-cyrus-sasl=/opt/homebrew/opt/cyrus-sasl \
  && make \
  && make install
Now we need to install isync properly. Add , "--with-sasl=/opt/homebrew/opt/cyrus-sasl" to the ./configure line in the def install section. Add a depends_on "cyrus-sasl" below depends_on "openssl@3" but I’m unsure if this is required since it was manually installed. Here is the diff to isync.rb
29a30
>   depends_on "cyrus-sasl"
35c36
<     system "./configure", *std_configure_args, "--disable-silent-rules"
---
>     system "./configure", *std_configure_args, "--disable-silent-rules", "--with-sasl=/opt/homebrew/opt/cyrus-sasl"
Finally, we can install isync:
$ HOMEBREW_NO_INSTALL_FROM_API=1 brew install -s isync
Or if you are using fish:
$ env HOMEBREW_NO_INSTALL_FROM_API=1 brew install -s isync
This should work! I know this is a mess but it works!
Arch Linux
$ sudo pacman -Syu isync
$ # or
$ paru -Syu isync
Gentoo
$ sudo emerge --ask net-mail/isync
Ubuntu and WSL2 using Ubuntu
$ sudo apt install isync
Configuring isync
To start, you need to create a configuration file for isync, typically named .mbsyncrc in your home directory:
$ touch ~/.mbsyncrc
Here’s an example configuration that you might use for Gmail (note that isync.gpg is a file that contains your GPG-encrypted password for isync):
IMAPAccount Gmail
Host imap.gmail.com
User your_email@gmail.com
PassCmd "gpg -dq ~/.config/mutt/isync.gpg"
SSLType IMAPS
CertificateFile /etc/ssl/certs/ca-certificates.crt

IMAPStore Gmail-remote
Account Gmail

MaildirStore Gmail-local
Path ~/Mail/Gmail/
Inbox ~/Mail/Gmail/INBOX

Channel Gmail
Master :Gmail-remote:
Slave :Gmail-local:
Patterns "INBOX"
Expunge Both
SyncState *
Here is my configuration:
IMAPAccount gmail
Host imap.gmail.com
Port 993
User cjh16@rice.edu
PassCmd "gpg -dq --for-your-eyes-only --no-tty ~/.config/mutt/isync.gpg"
SSLType IMAPS
CertificateFile  /opt/homebrew/Cellar/ca-certificates/2024-03-11/share/ca-certificates/cacert.pem

IMAPStore gmail-remote
Account gmail

MaildirStore gmail-local
Subfolders Verbatim
Path ~/.local/share/email/cjh16/
INBOX ~/.local/share/email/cjh16/INBOX
Flatten .

Channel gmail
Far :gmail-remote:
Near :gmail-local:
Patterns *
# Automatically create missing mailboxes, both locally and on the server
Create Both
# Sync the movement of messages between folders and deletions, add after making sure the sync works
Expunge Both
# Save the synchronization state files in the relevant directory
SyncState *
MaxMessages 0
This configuration tells isync to sync your Gmail’s INBOX to a local directory. It uses GPG to decrypt your password securely.
Running isync
To sync your mail, simply run:
$ mbsync -a # or `mbsync gmail`
This command will sync all channels defined in your .mbsyncrc file and download your emails to your local machine.
Homebrew provides a service to run mbsync every 15 minutes.
You can enable this by running brew services start isync.
Neomutt integration
Now that you have isync set up, you can configure Neomutt to use the local mail directory to read your emails. To do this, you need to modify your muttrc file:
# My mailboxes
set mbox_type = Maildir
set folder = "~/.local/share/email/cjh16"
set spoolfile = "+[Gmail].All Mail"
set postponed = "+[Gmail].Drafts"
set record = "+[Gmail].Sent Mail"
set trash = "+[Gmail].Trash"
mailboxes ="[Gmail].All Mail" ="[Gmail].Starred" ="[Gmail].Important" ="[Gmail].Drafts" ="[Gmail].Sent Mail" ="[Gmail].Trash" ="[Gmail].Spam" =INBOX
Notice that we changed the mbox_type to Maildir and set the folder to the path where isync stores your emails. This will allow Neomutt to read your emails from the local directory. Now, the next time you open Neomutt, it will be a bit slow, but after that, it will be lightning fast!
msmtp
msmtp is a simple SMTP client that allows you to send emails from your local computer. When paired with isync, it handles the sending of emails, completing your email setup to work both offline and online. Additionally, you can set up msmtp for multiple email accounts, making it a versatile tool for managing your emails.
Installation
macOS
$ brew install msmtp
Arch Linux
$ sudo pacman -Syu msmtp
$ # or
$ paru -Syu msmtp
Gentoo
$ sudo emerge --ask mail-mta/msmtp
Ubuntu and WSL2 using Ubuntu
$ sudo apt install msmtp
Configuring msmtp
Create a configuration file for msmtp in your home directory:
$ touch ~/.msmtprc # or $XDG_CONFIG_HOME/msmtprc/config
Here’s a basic configuration for Gmail (note that msmtp.gpg is a file that contains your GPG-encrypted password for Gmail):
defaults
auth on
tls on
tls_trust_file /etc/ssl/certs/ca-certificates.crt

account gmail
host smtp.gmail.com
port 465
from your_email@gmail.com
user your_email@gmail.com
password_eval "gpg -dq ~/.config/mutt/msmtp.gpg"

account default : gmail
This is my configuration:
# Set default values for all following accounts.
defaults
auth           on
tls on
tls_starttls on
tls_trust_file /opt/homebrew/Cellar/ca-certificates/2024-03-11/share/ca-certificates/cacert.pem
logfile        ~/.config/msmtp/msmtp.log

# Gmail
account        gmail
host           smtp.gmail.com
port           465
tls_starttls   off
from           cjh16@rice.edu
user           cjh16@rice.edu
passwordeval   "gpg -dq ~/.config/mutt/msmtp.gpg"

# Set a default account
account default: gmail
This configuration will use your Gmail account to send emails through SMTP, using a password fetched securely using GPG.
Using msmtp
To send an email using msmtp, you can pipe the content of an email file like so:
$ cat email.txt | msmtp -a default [email protected]
To test you can run:
$ echo "hello there username." | msmtp -a default [email protected]
You should email me for fun: $ echo "Hi SeniorMars!" | msmtp -a default [email protected]
Neomutt integration
To integrate msmtp with Neomutt, you need to modify your muttrc file:
set sendmail = "msmtp -a [email protected]"
That’s it! Now, when you send an email in Neomutt, it will use msmtp to send the email.
notmuch
notmuch is an email indexing tool that provides fast searching capabilities. It is useful when dealing with large volumes of email, helping you to quickly find exactly what you need. Especially when paired with Neomutt and isync, notmuch can significantly improve your email workflow.
Installation
macOS
$ brew install notmuch
Arch Linux
$ sudo pacman -Syu notmuch
$ # or
$ paru -Syu notmuch
Gentoo
$ sudo emerge --ask mail-filter/notmuch
Ubuntu and WSL2 using Ubuntu
$ sudo apt install notmuch
Configuring notmuch
First, initialize notmuch:
$ notmuch setup
Follow the prompts to set up your email directory (for me it is ~/.local/share/email/cjh16). Then, you can start searching your emails by using:
$ notmuch search "from:[email protected]"
Notmuch will index your emails located in the directory specified during setup, allowing you to use powerful search queries to navigate your mail efficiently.
Neomutt integration
To integrate notmuch with Neomutt, you need to modify your muttrc file:
macro index S "<shell-escape>mbsync -V gmail<enter><shell-escape>notmuch new<enter>" "sync email"
macro index \Cf "<enter-command>unset wait_key<enter><shell-escape>read -p 'Enter a search term to find with notmuch: ' x; echo \$x >~/.cache/mutt_terms<enter><limit>~i \"\`notmuch search --output=messages \$(cat ~/.cache/mutt_terms) | head -n 600 | perl -le '@a=<>;s/\^id:// for@a;$,=\"|\";print@a' | perl -le '@a=<>; chomp@a; s/\\+/\\\\+/ for@a;print@a' \`\"<enter>" "show only messages matching a notmuch pattern"
This will allow us to sync our emails and search our emails using notmuch directly from Neomutt. Pretty cool!
Things left desired
Honestly, I love my setup, but there could always be improvements. Notably:
- I want to not use app-specific passwords. I would like to use OAuth2, but my school blocks us from doing anything technical.
- I would like to auto complete email addresses from my contacts. I have a lot of contacts, and I don’t remember all of their emails.
- Sometimes I want images lmao! I’ve been trying to mess around with Kitty but macos is a pain.
# text/html; kitty @ launch --type overlay --title neomutt-html w3m -I %{charset} -T text/html -graph -F -no-cookie -o confirm_qq=FALSE -o use_wide=TRUE -o display_link=TRUE -o display_link_number=TRUE -o color=TRUE -o auto_image=TRUE -o display_image=TRUE -o max_load_image=20 -o inline_img_protocol=4  %s; nametemplate=%s.html
text/html; open -a Firefox %s; test=test -n "$DISPLAY"; needsterminal;
text/html; lynx -assume_charset=%{charset} -display_charset=utf-8 -dump -width=1024 %s; nametemplate=%s.html; copiousoutput;
text/plain; cat %s; copiousoutput;
image/*; icat.sh '%s'; test=test -n "$DISPLAY"; needsterminal;
video/*; setsid mpv --quiet %s &; copiousoutput
audio/*; mpv %s ;
application/pdf; open -a Firefox %s; test=test -n "$DISPLAY"; needsterminal;
application/pgp-encrypted; gpg -d '%s'; copiousoutput;
application/pgp-keys; gpg --import '%s'; copiousoutput;
application/x-subrip; $EDITOR %s ;
application/octet-stream; icat.sh '%s'; test=test -n "$DISPLAY"; needsterminal;
- I want to fix cache contact with
lbdbqandnotmuch. I have tried, but I can’t get it to work.
#!/bin/bash
# Query lbdbq and save results to Mutt alias file

set -e

# Mutt aliases file to save results to
ALIASES="$HOME/.cache/mutt/aliases"

# Only save email addresses from $DOMAIN. Leave empty to save all email addresses
DOMAIN="rice.edu"

query_and_cache() {
    results=$(lbdbq "$@" 2>/dev/null)

    printf '%s\n' "$results"

    # Remove first line from results
    results=$(sed '1d' <<< "$results")

    # Format results like mutt aliases
    sed -E $'s/^([[:alnum:]_.]+)@([[:alnum:]_.]+)\t([[:alnum:] -]+)/alias \\1 \\1@\\2 (\\3)/' <<< "$results" | awk -v domain="$DOMAIN" '$3 ~ domain {$2=tolower($2);print}' >> "$ALIASES"

    # Sort and remove duplicates
    sort -u -o "$ALIASES" "$ALIASES"

}

query_and_cache "$@"
That being said, I am happy with my setup. I can send and receive emails, and I can search my emails quickly. I can also encrypt my emails, which is a plus.
Conclusion
I hope you enjoyed this tutorial! If you have any questions, don’t ask /s.
Here is my final configuration. And again, here is how my email client looks (lol taxes with github now):
I am going to upload a talk I gave on setting up Neovim for non-programmers soon. This talks about grammar checking, spell keybinds, and more. So stay tuned!
Thanks for reading and have a nice day!
SeniorMars